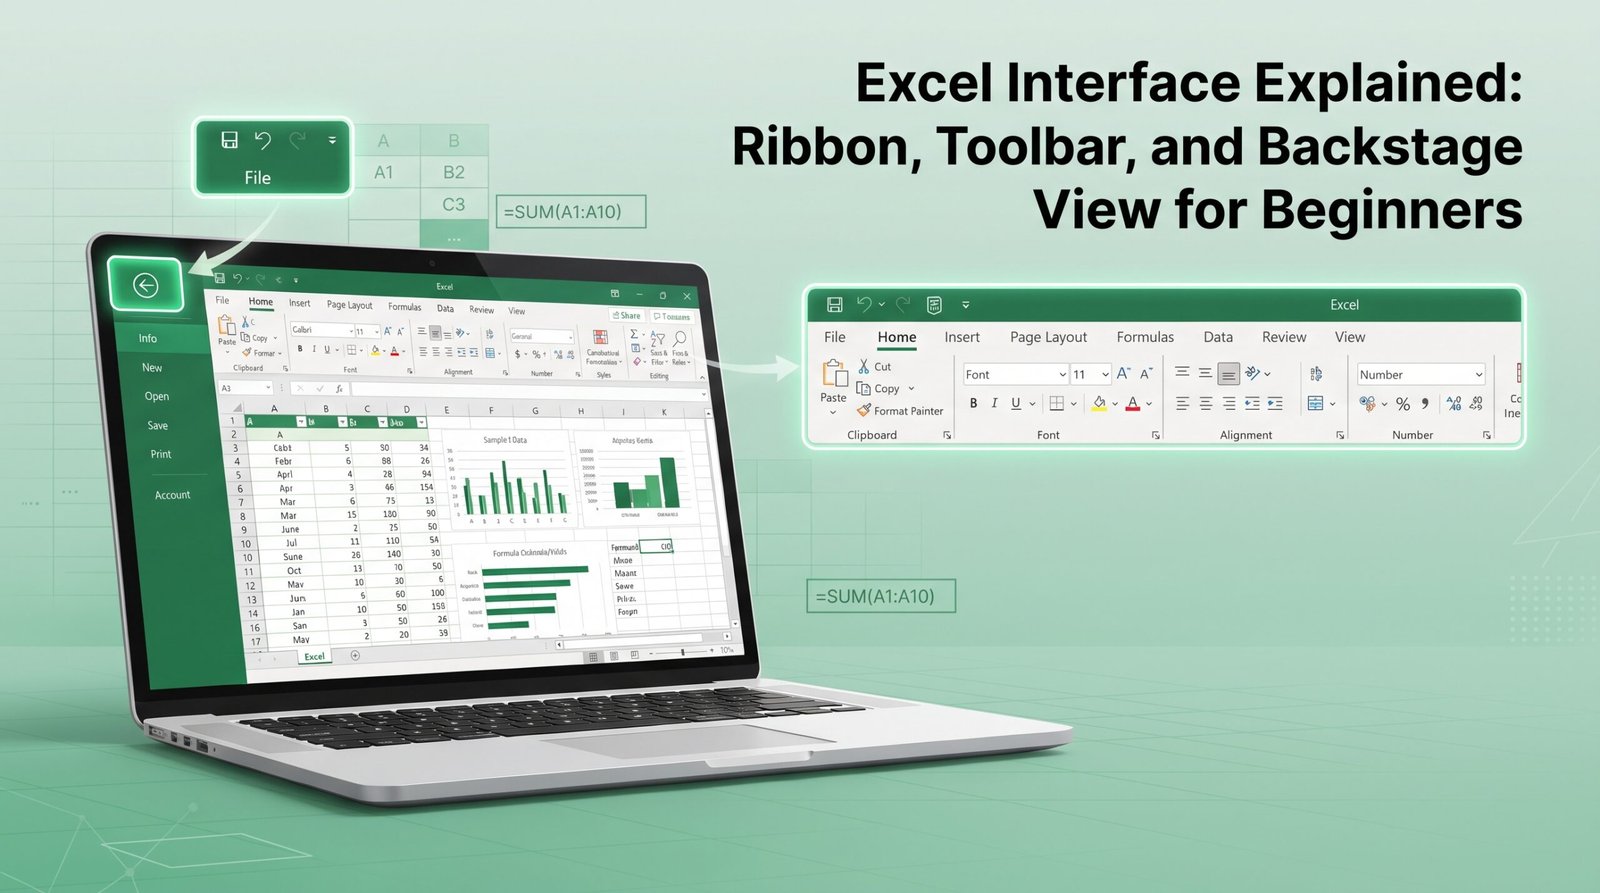

If you followed along with What Is Excel Used For? A Beginner’s Guide to Microsoft Excel, you already know what Excel does. This post picks up right where that one left off. Before you build another spreadsheet, I want you to get comfortable with the screen itself.
Quick Takeaway: The Excel interface has three main parts: the Ribbon at the top holds every command, organized into tabs like Home and Insert. The Quick Access Toolbar sits above or below the Ribbon and holds a few commands you pick yourself. Backstage View, opened from the File tab, is where you save, open, and print your workbook.
If you’ve ever opened Excel and felt a little lost staring at all those buttons across the top, I’ve been there too. This post is the Excel interface explained the way I wish someone had explained it to me.
By the end of this post, you’ll know what the Ribbon is and how its tabs are organized, how to pin your favorite commands to the Quick Access Toolbar, and how to use Backstage View to save, print, and manage your files.
A Bit of Context Before We Start
If you’ve used a much older version of Excel, or you’ve seen screenshots of one, you might remember long dropdown menus instead of the tabs you see today. Microsoft replaced those menus with the Ribbon starting in Excel 2007, grouping related commands together visually instead of hiding them in nested menus. That’s why the interface looks the way it does now, and why this post focuses on the Ribbon instead of old-style menus.
A quick note on versions: Everything in this post applies to Excel 2007 and later, which includes Excel for Microsoft 365, Excel for Mac, and Excel for the web. Backstage View specifically was introduced in Excel 2010, so if you’re ever stuck on a much older version, that one piece may look different.
Download the practice file before you start: It’s a simple sheet with sample budget data, so you have something real to click around in as you follow along. Grab it now so you’re not just reading about the interface, you’re exploring it.
What You’ll Need
- Excel 2007 or later, Microsoft 365, Excel for Mac, or Excel for the web (free).
- A few minutes to click around without worrying about breaking anything. Nothing in this post changes your data permanently.
So, What Does the Excel Interface Look Like? Five Things to Get Oriented On
Step 1: Find the Three Big Areas of the Screen
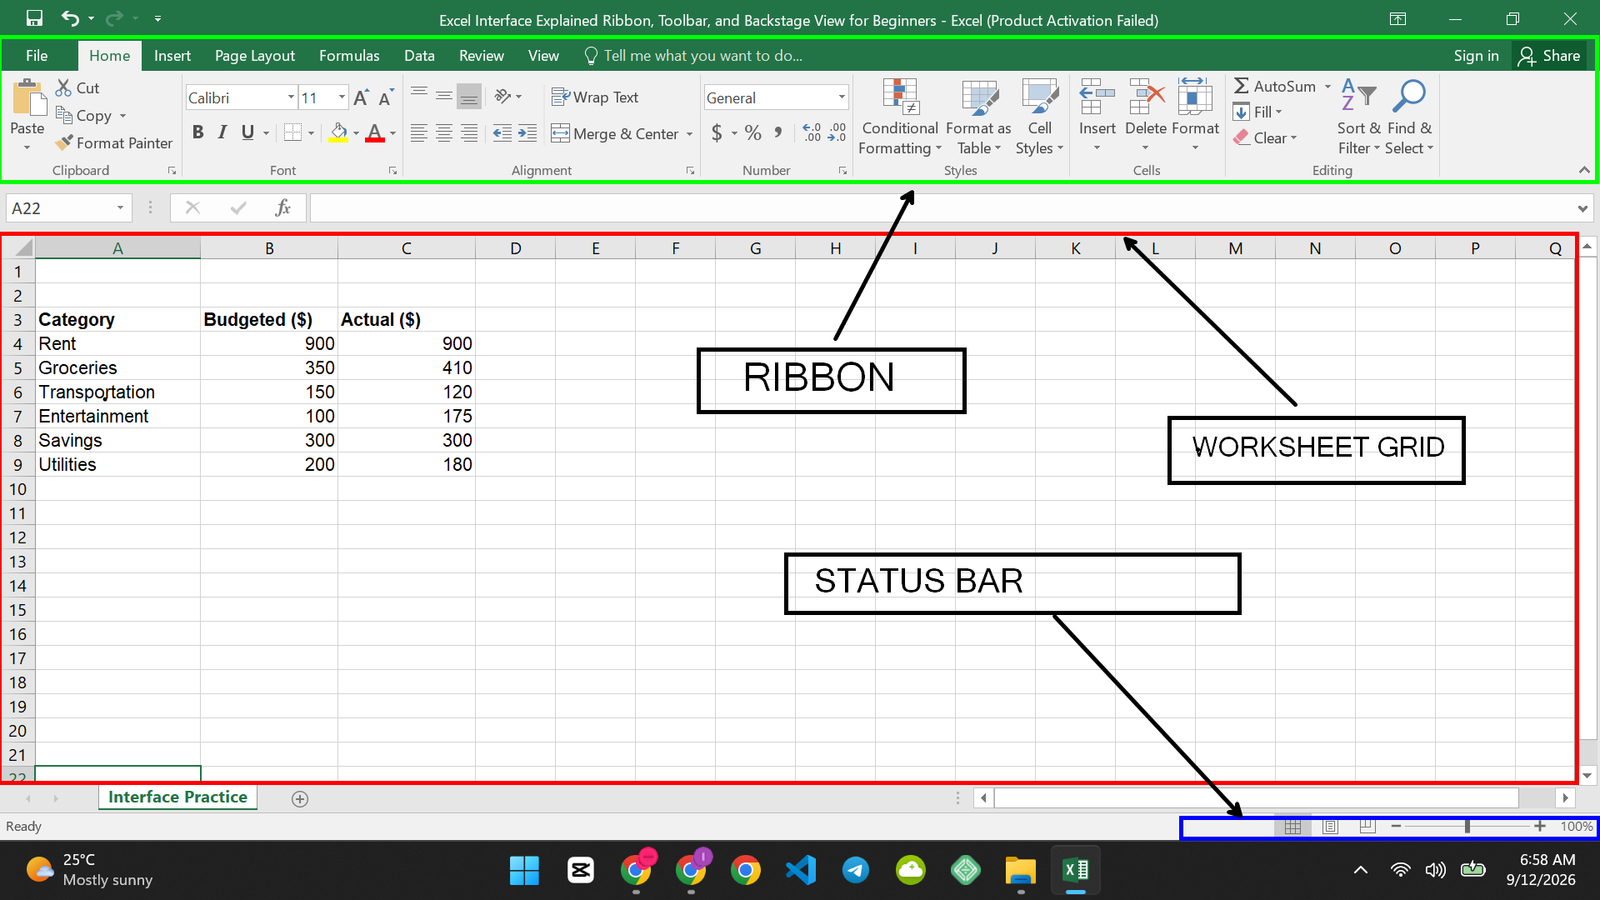
What to do: Open Excel. Look at the screen in three horizontal bands. The Ribbon sits across the very top. It has tabs like Home, Insert, and Page Layout. The worksheet grid sits in the middle. That’s the rows and columns. The status bar sits along the bottom. It shows your zoom level and a few quick calculations.
Why I’m having you do it this way: Once you can name these three areas, every other instruction in Excel makes more sense. When I say “go to the Home tab,” you’ll already know that means looking up top, not searching through the grid.
What you should see: A row of tabs at the top. Your data, or a blank grid, in the middle. A thin bar at the very bottom of the window.
Common mistake: Confusing the Ribbon with the worksheet grid when following instructions, especially on a smaller screen where everything feels close together.
Step 2: Explore the Ribbon Tabs
What to do: Open my practice file. Click the Home tab. Click Insert. Click Page Layout, then Formulas, then Data, then Review, then View. Click through them one at a time. Notice each tab’s buttons sit in small labeled groups, like “Font” or “Alignment” on the Home tab.
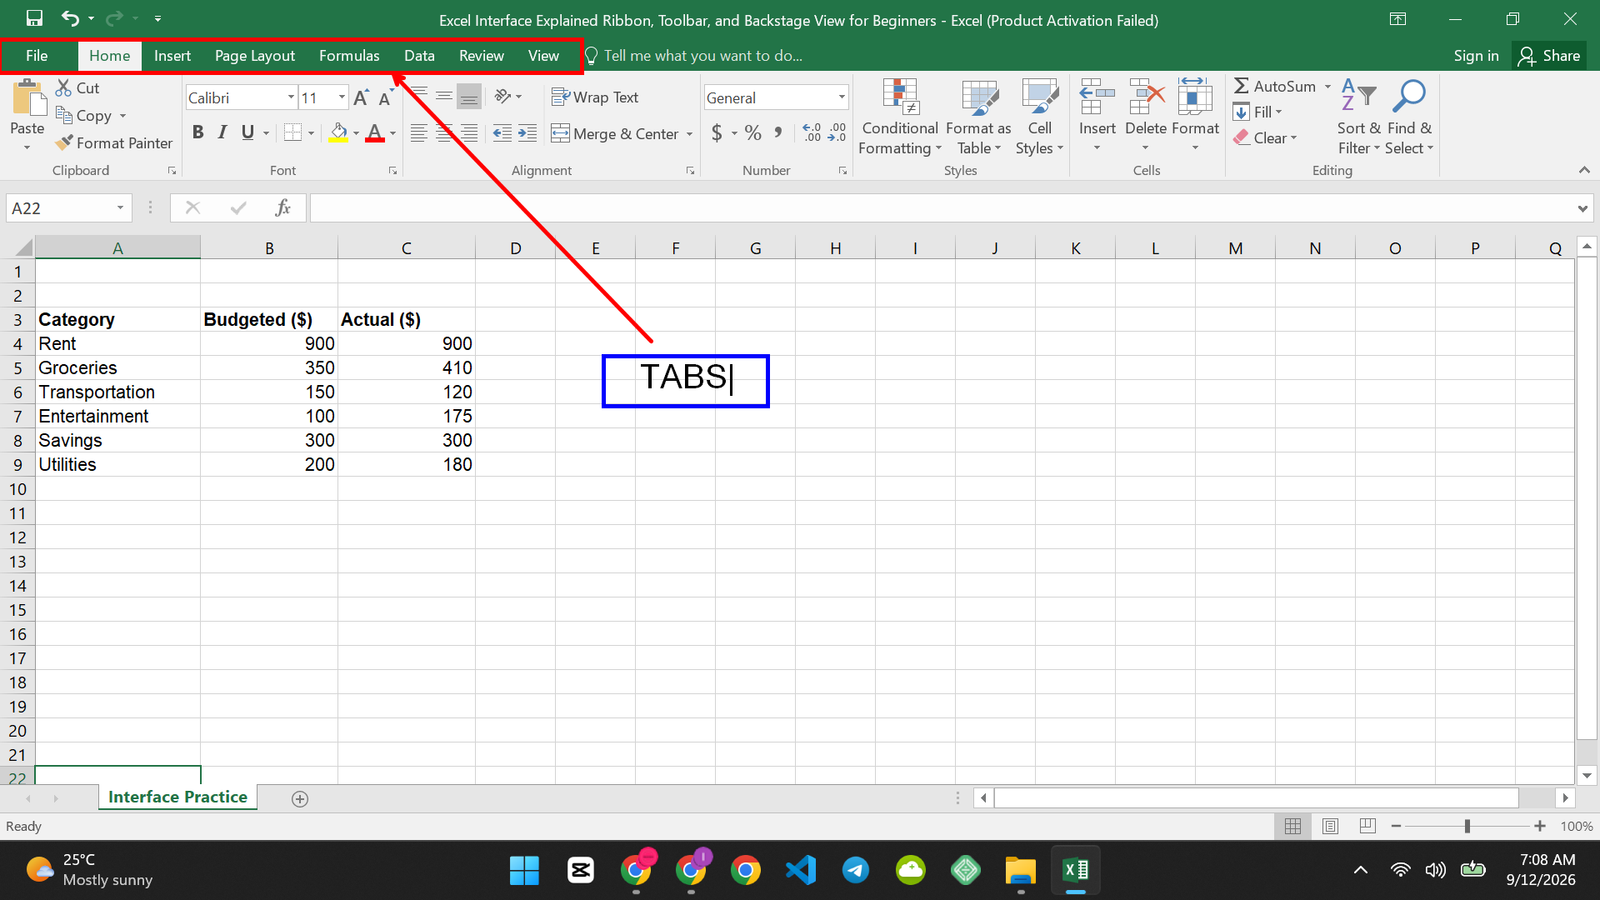
Why I’m having you do it this way: The Ribbon is not one long list. It’s organized by task. Formatting text lives on Home. Adding a chart lives on Insert. Once you know which tab owns which job, you stop hunting and start clicking straight to the right spot.
What you should see: The buttons change completely each time you click a different tab. The overall Ribbon height and tab row stay in the same place.
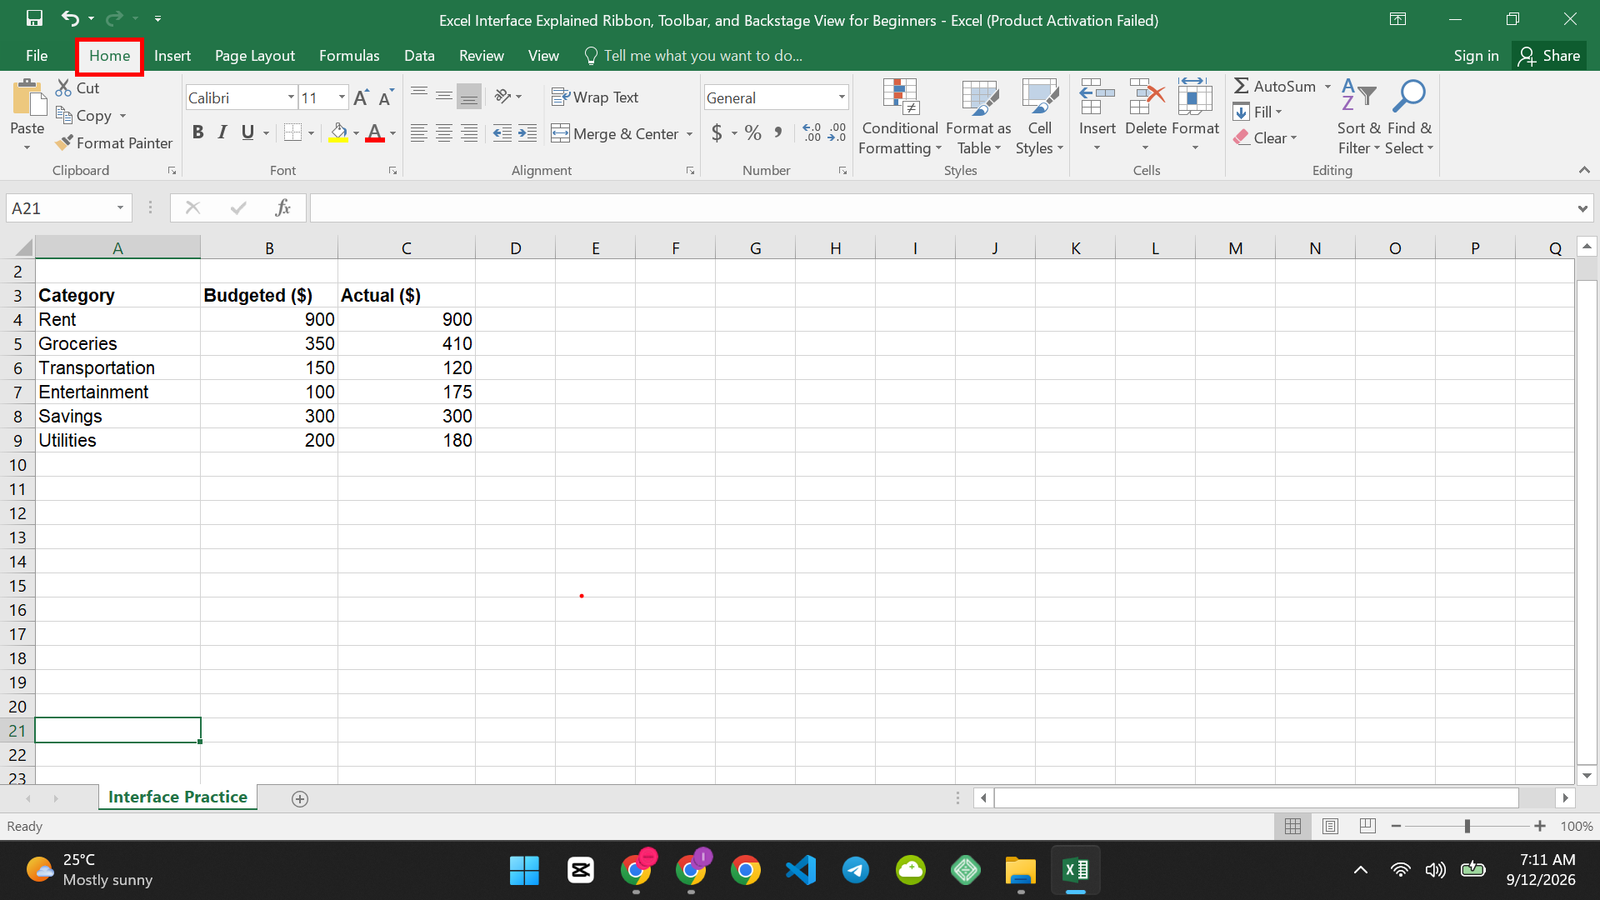
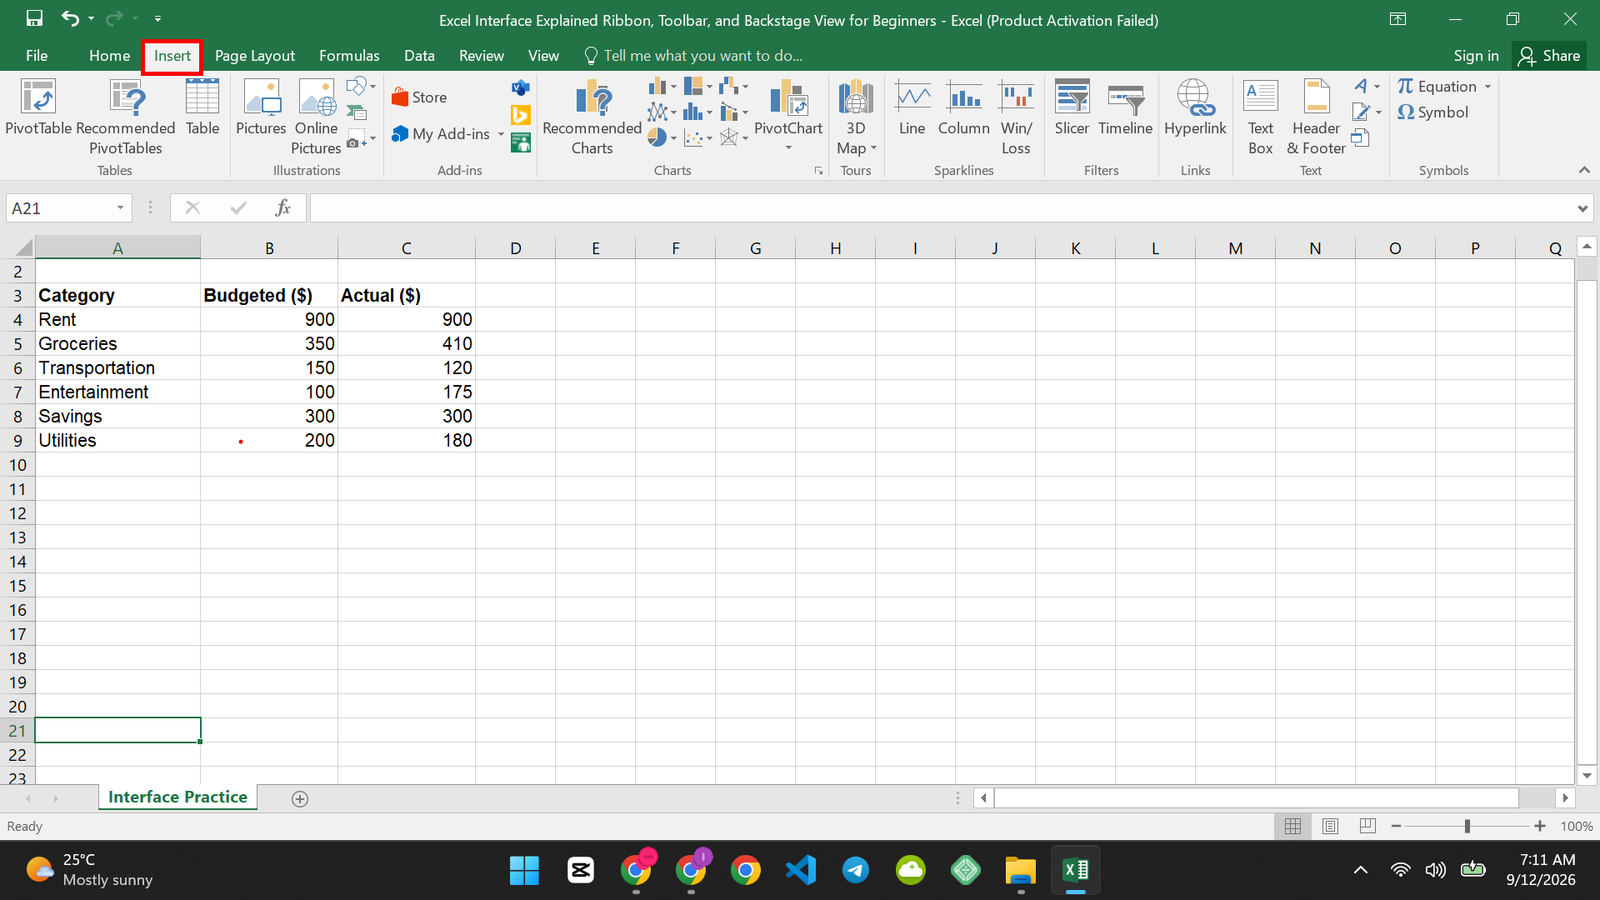
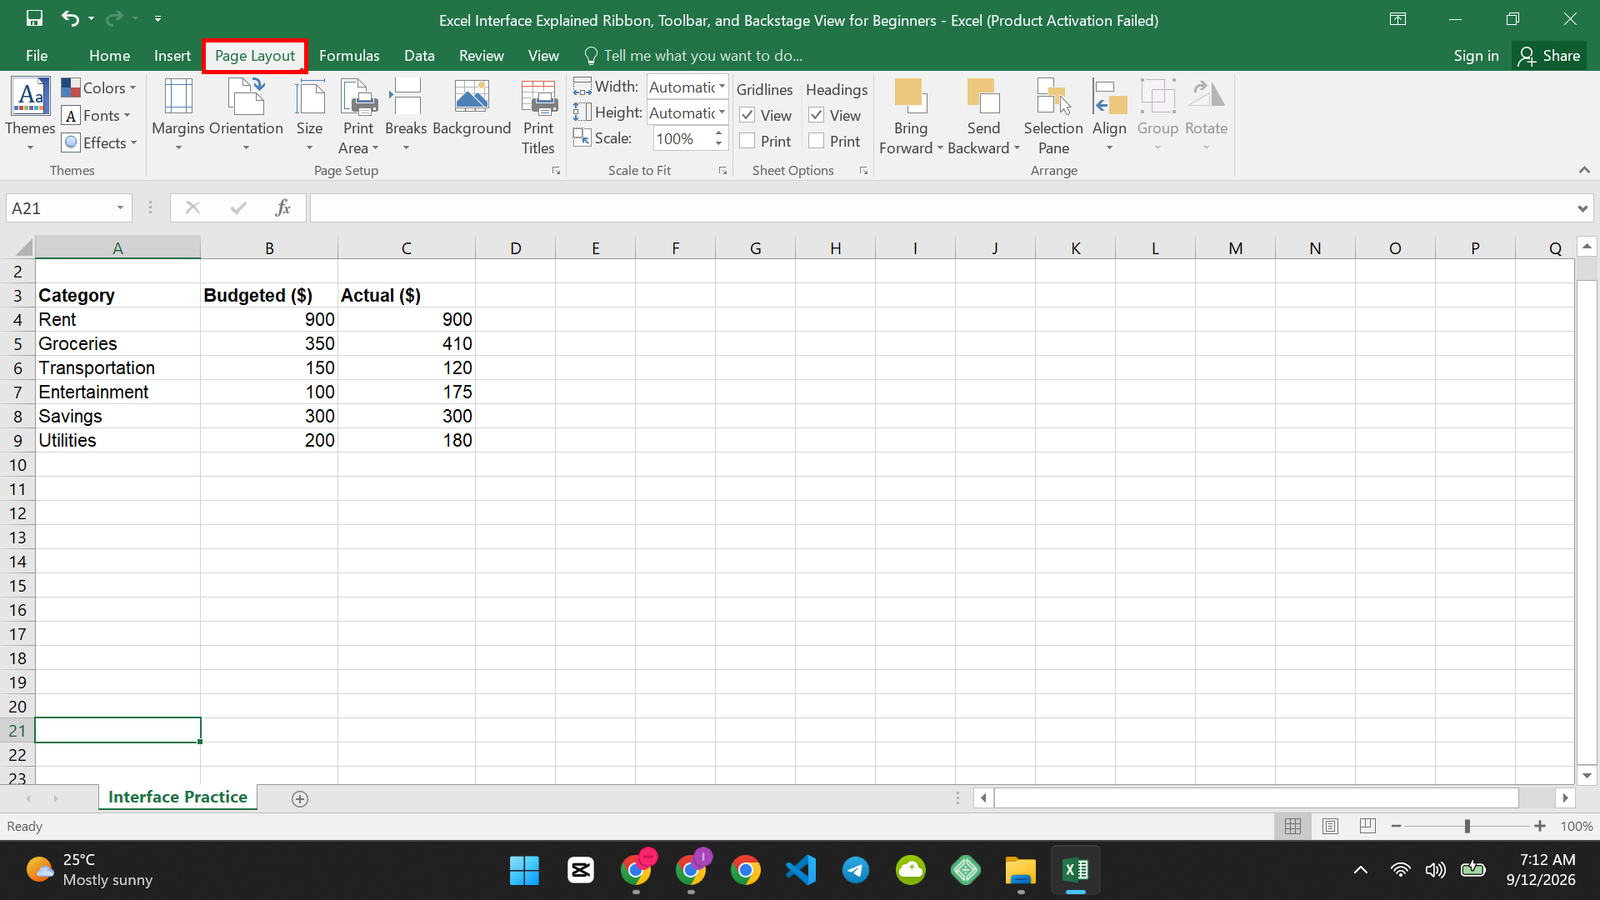
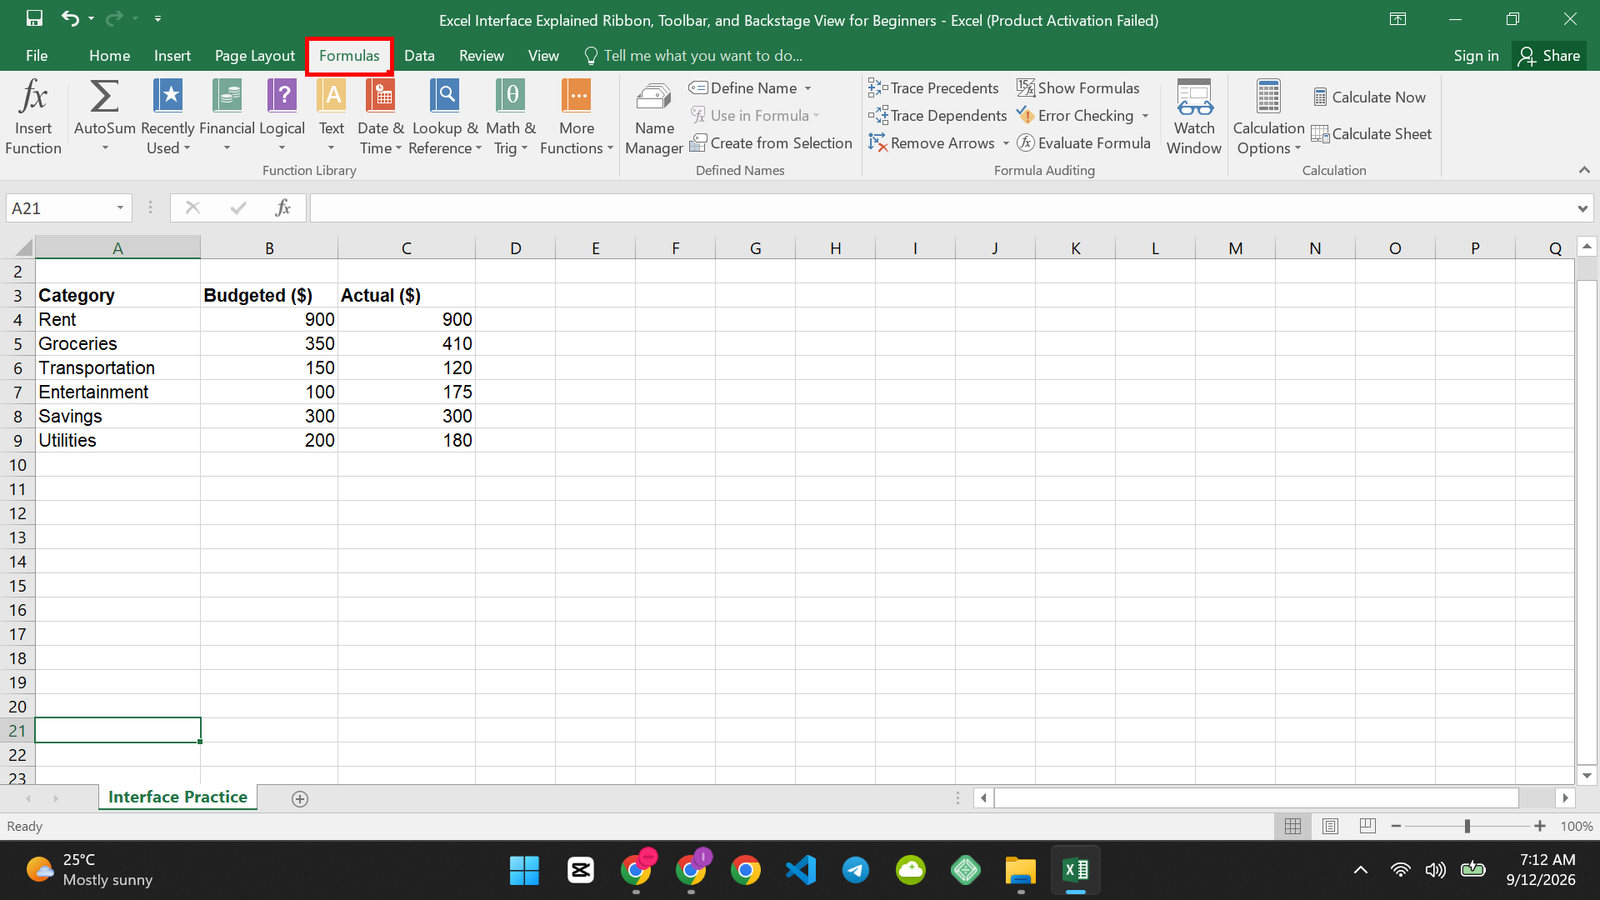
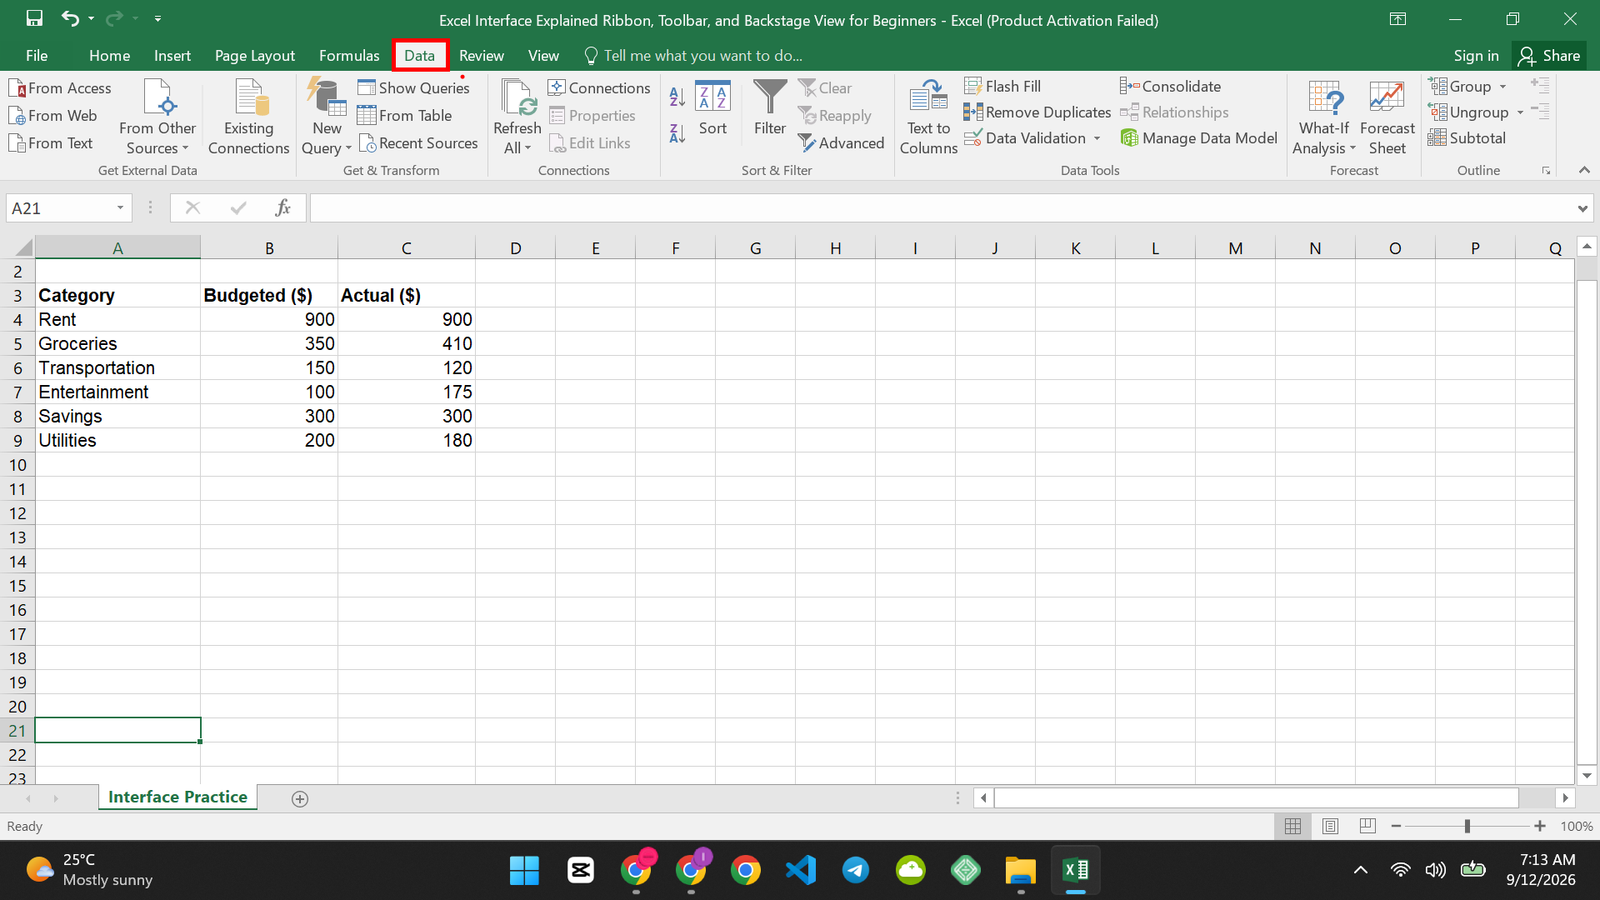
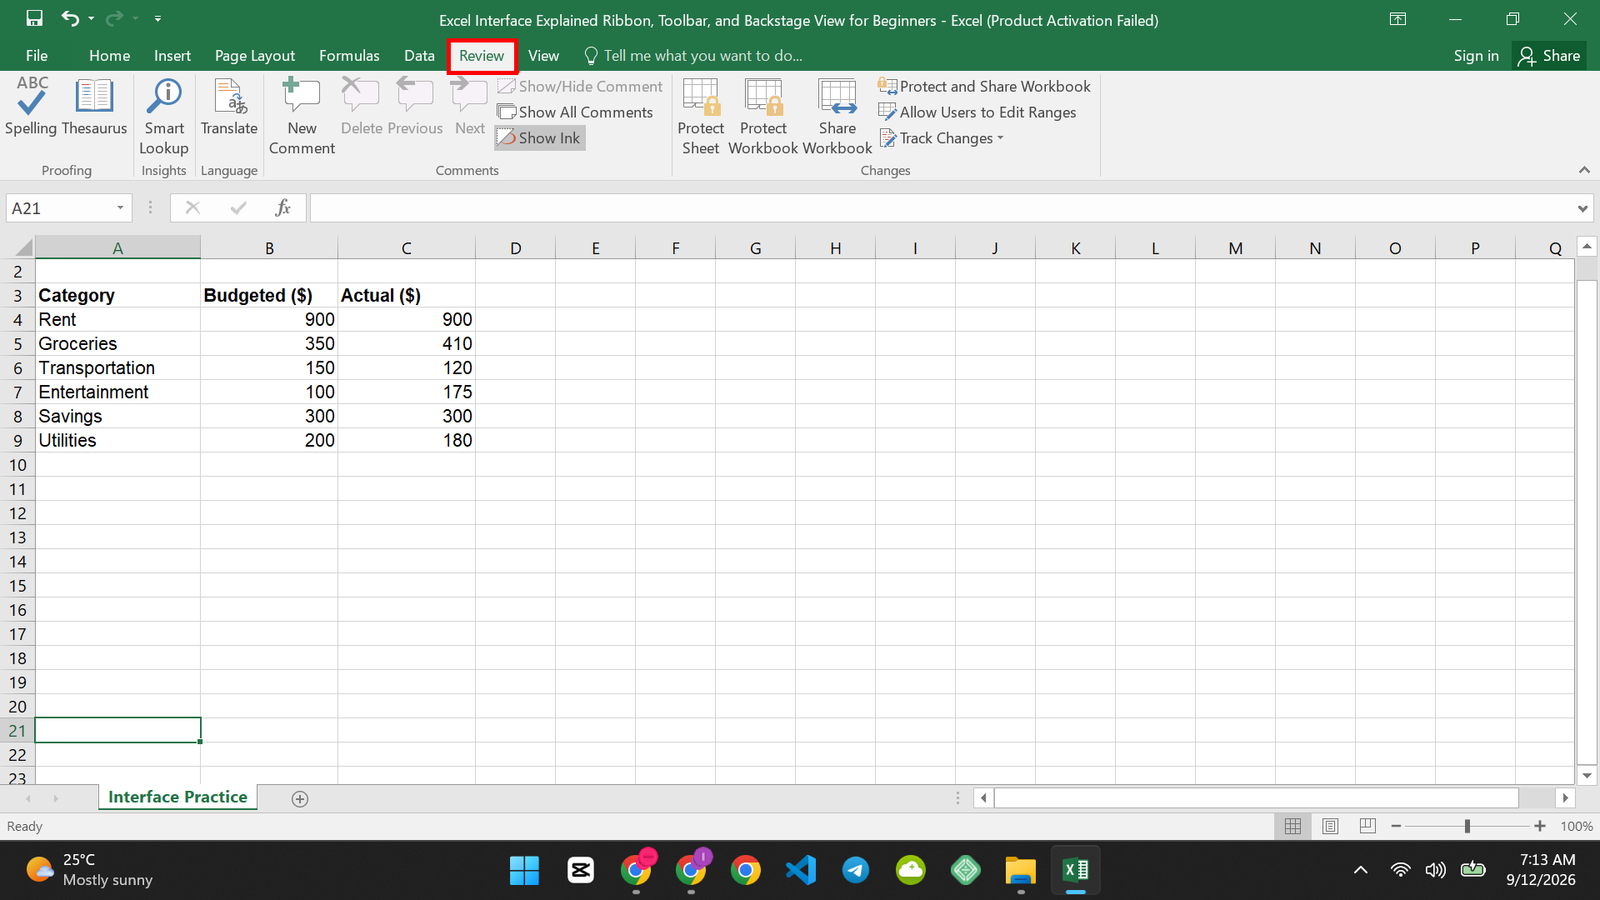
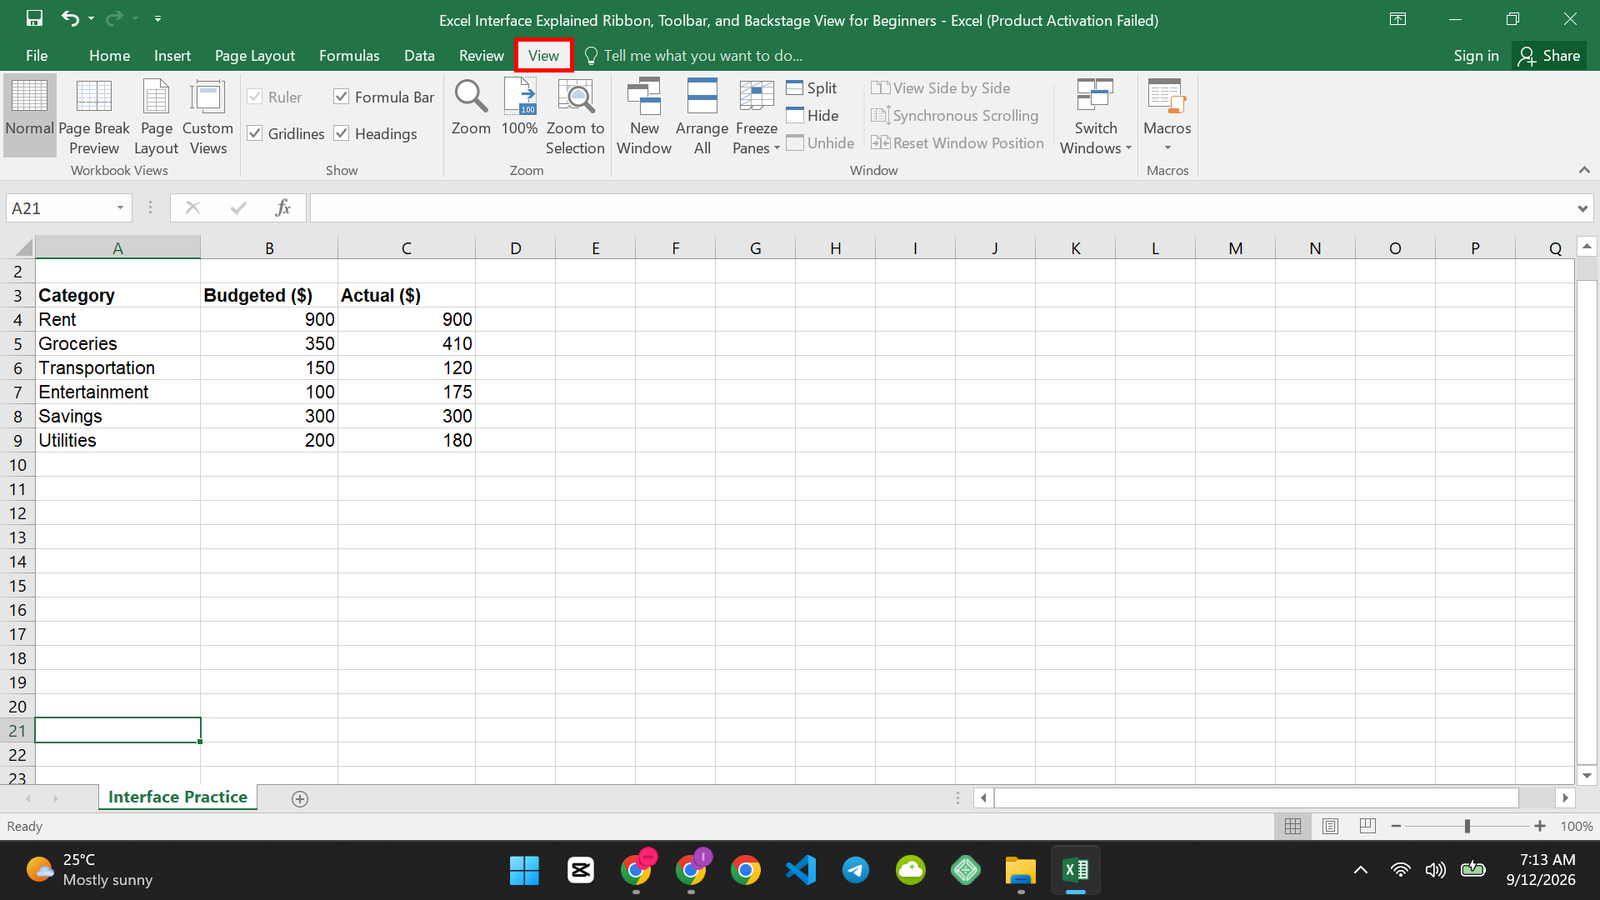
The following are the various tabs in Excel highlighted in Red rectangle and their respective commands.
Home Tab:
Insert Tab:
Page Layout tab:
Formulas Tab:
Data Tab:
Review Tab:
View Tab:
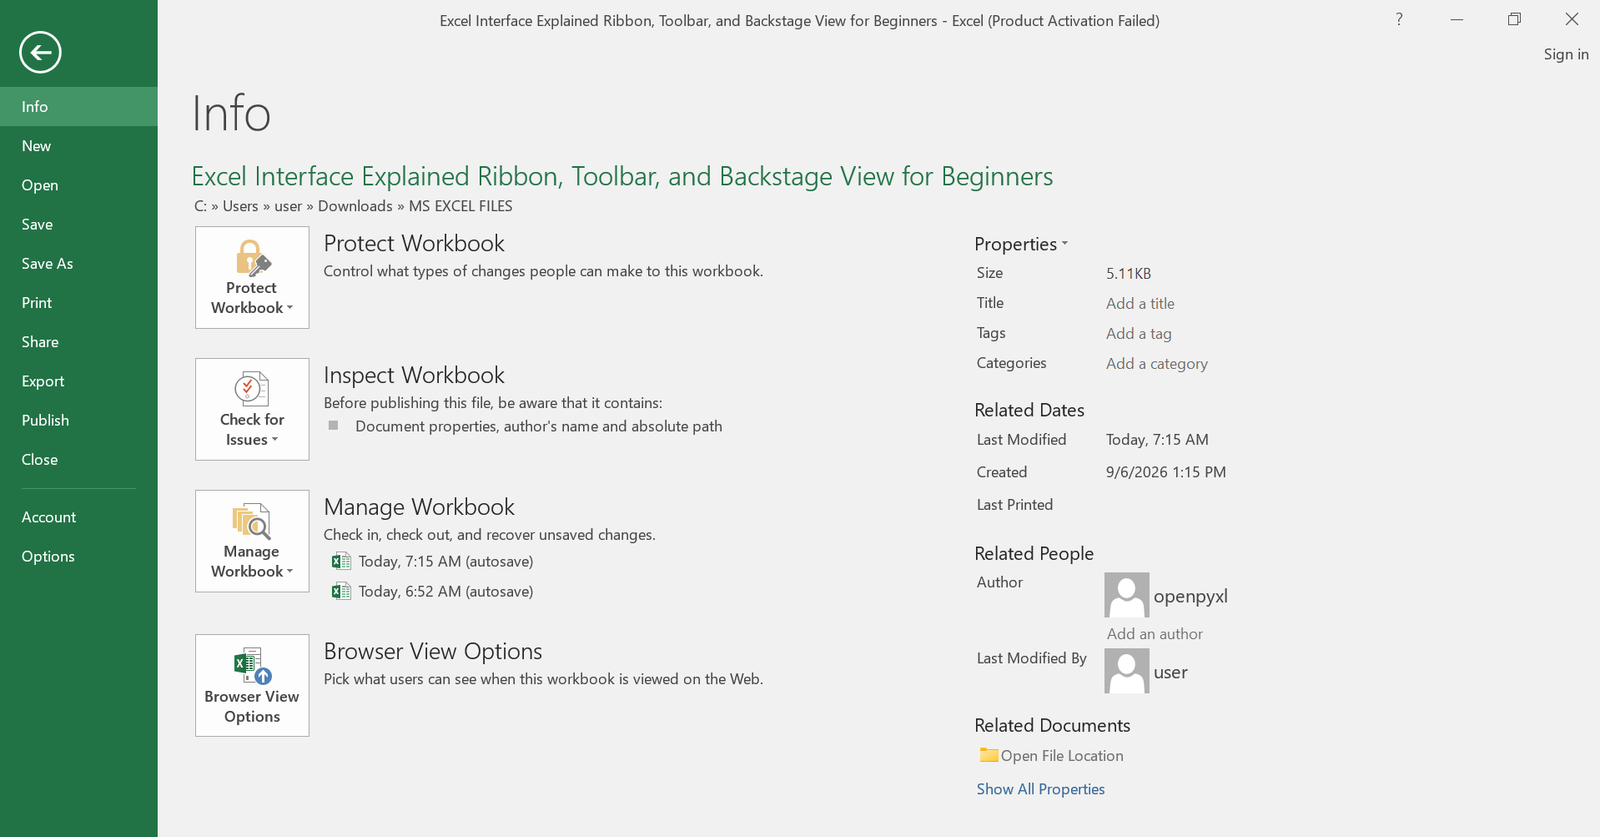
If you are observant, you will realise the file tab is not included in the above. This is so because it behaves differently from all the other tabs in Excel. Below screenshot represents what you will see when you click on the File tab:
Step 3: Pin Your Favorite Commands to the Quick Access Toolbar
What to do: Find the small row of icons above or below the Ribbon. It usually sits near the top-left of the window. That’s the Quick Access Toolbar.
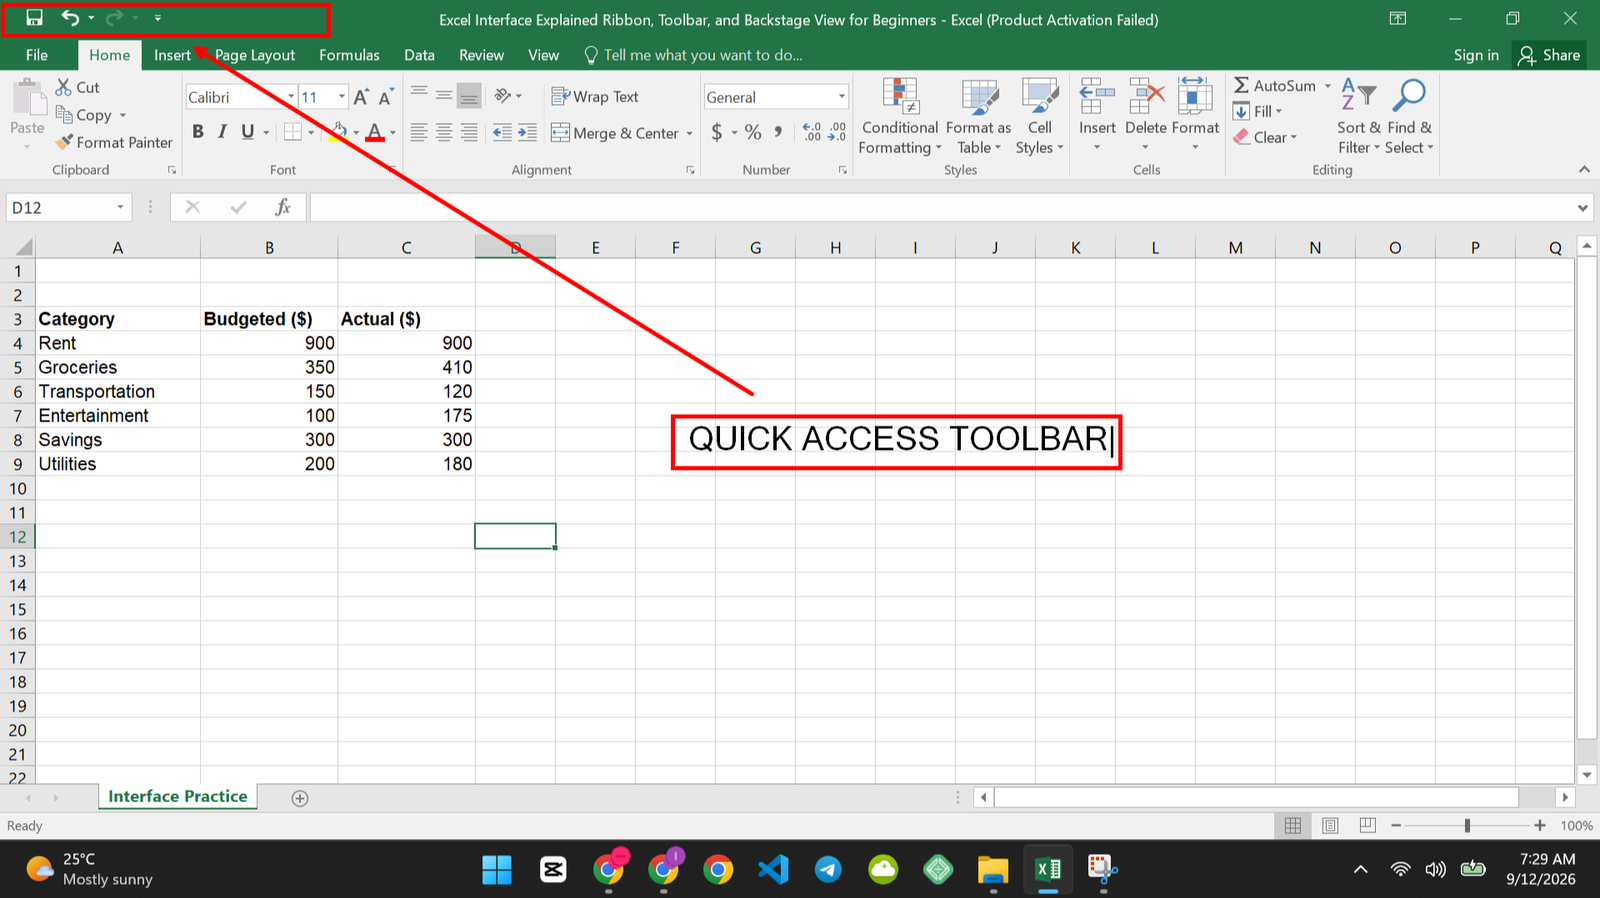
Right-click any button on the Ribbon, like Cut. Choose “Add to Quick Access Toolbar.”
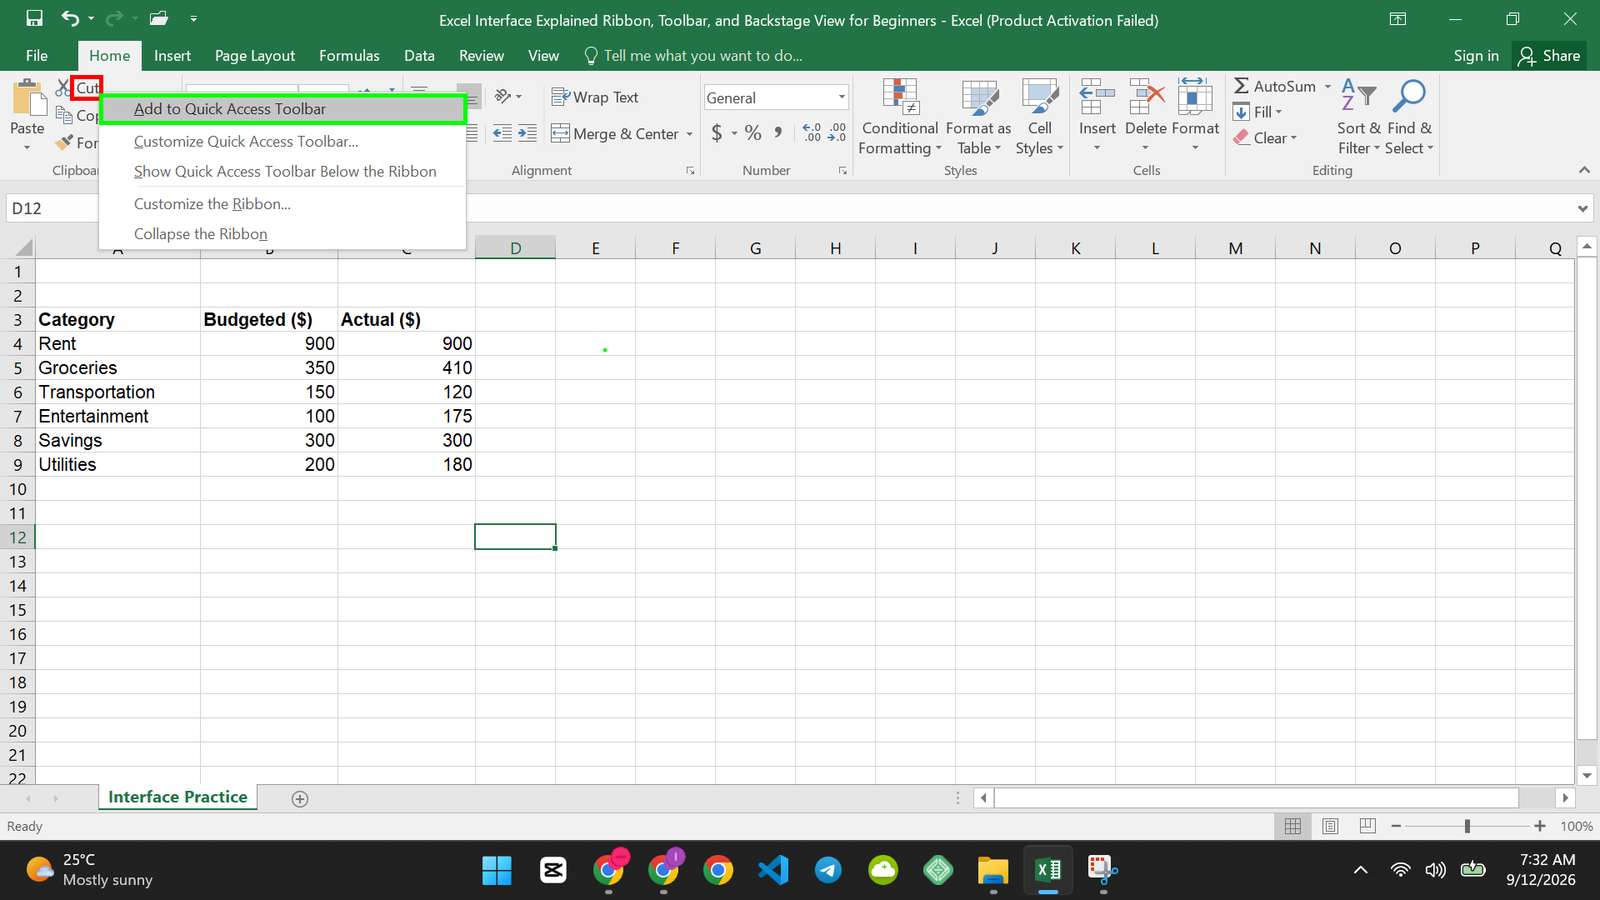
Why I’m having you do it this way: The Quick Access Toolbar stays visible no matter which Ribbon tab you’re on. If there’s a command you use constantly, pinning it here saves you from switching tabs just to reach it.
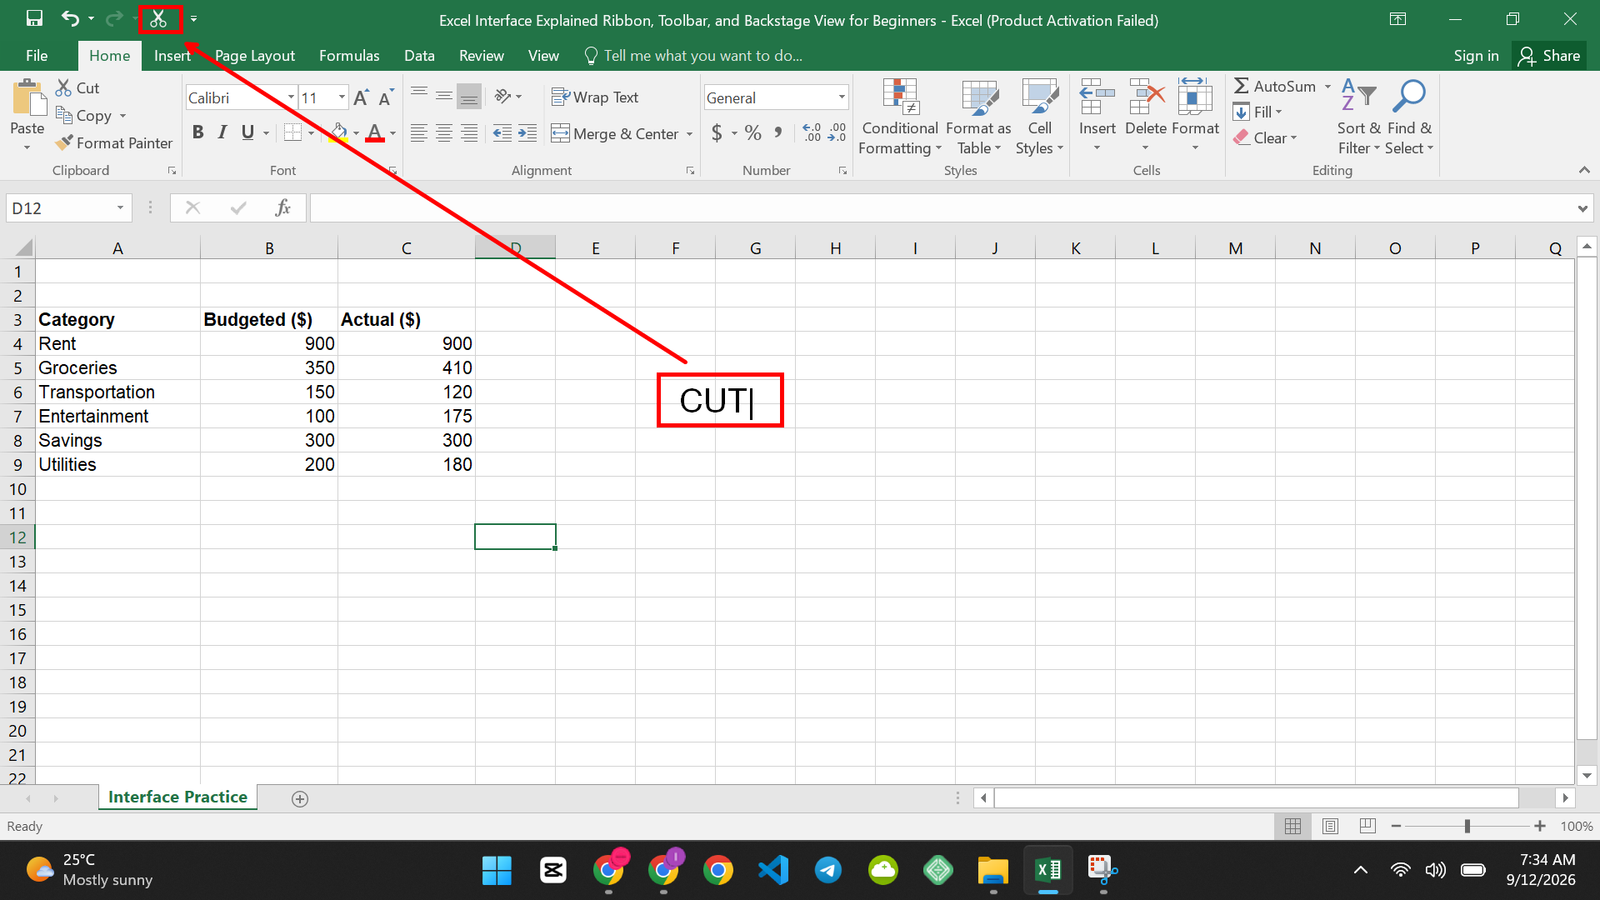
What you should see: A new small icon appears in the Quick Access Toolbar. It stays there even after you click to a different Ribbon tab.Since we added Cut, the icon for Cut will now appear in the Quick Access Toolbar as seen in the screenshot below.
Other Quick Access Toolbar Tips:
1. Showing the Quick Access Toolbar below the Ribbon: The default location of the Quick Access Toolbar is above the Ribbon but you can show it below the Ribbon if you like.
Right Click on any icon in the Quick Access Toolbar and click on Show Quick Access Toolbar below the Ribbon.
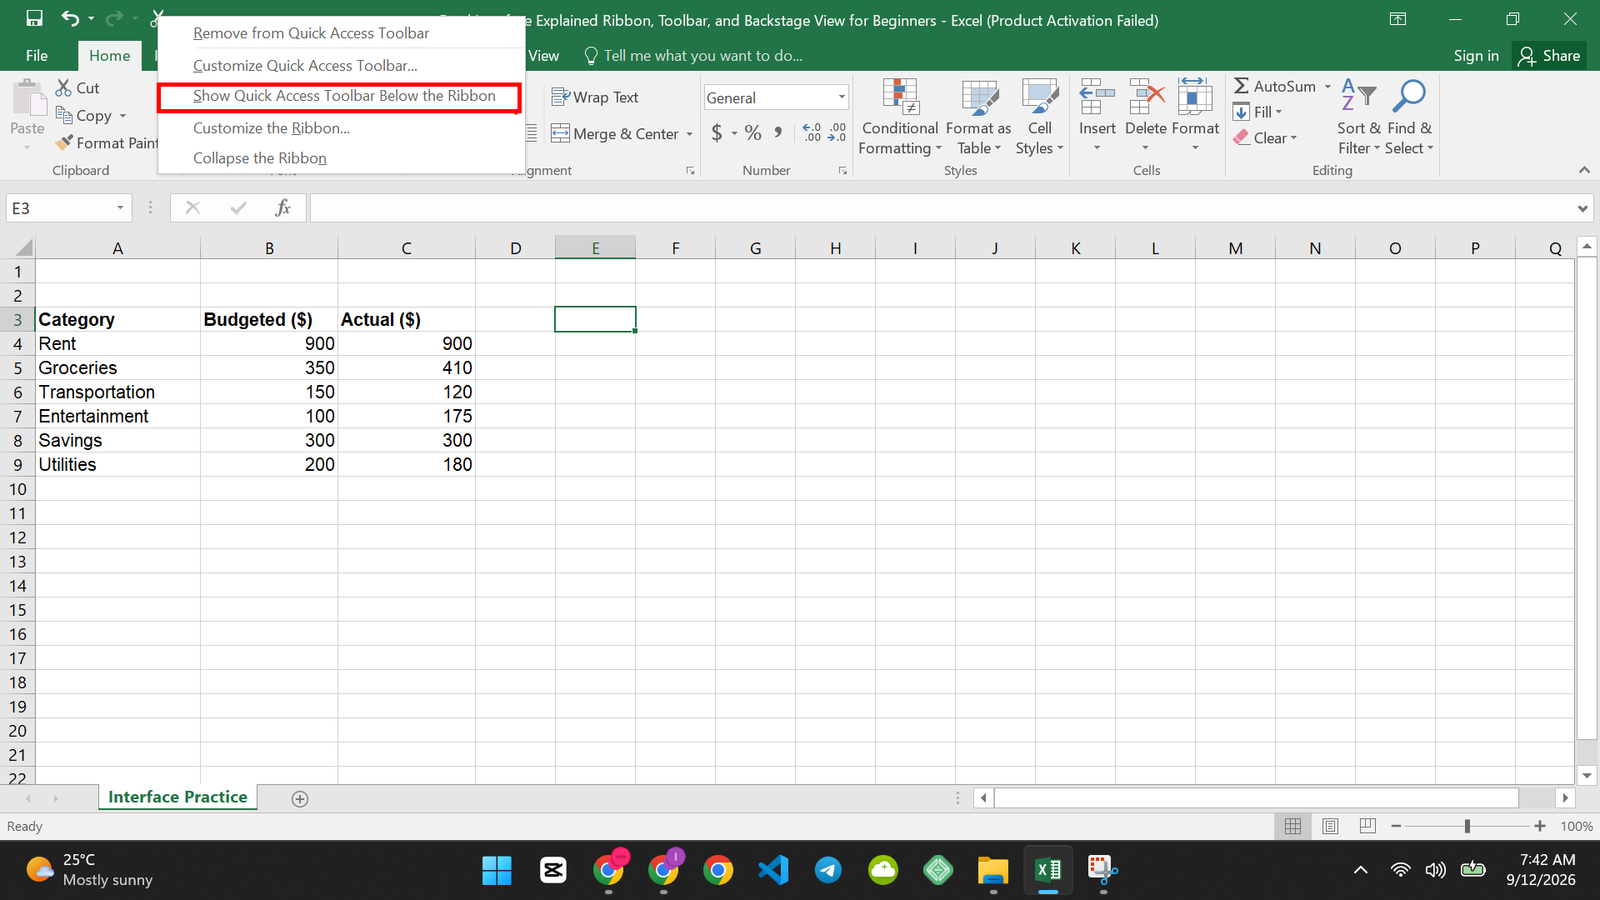
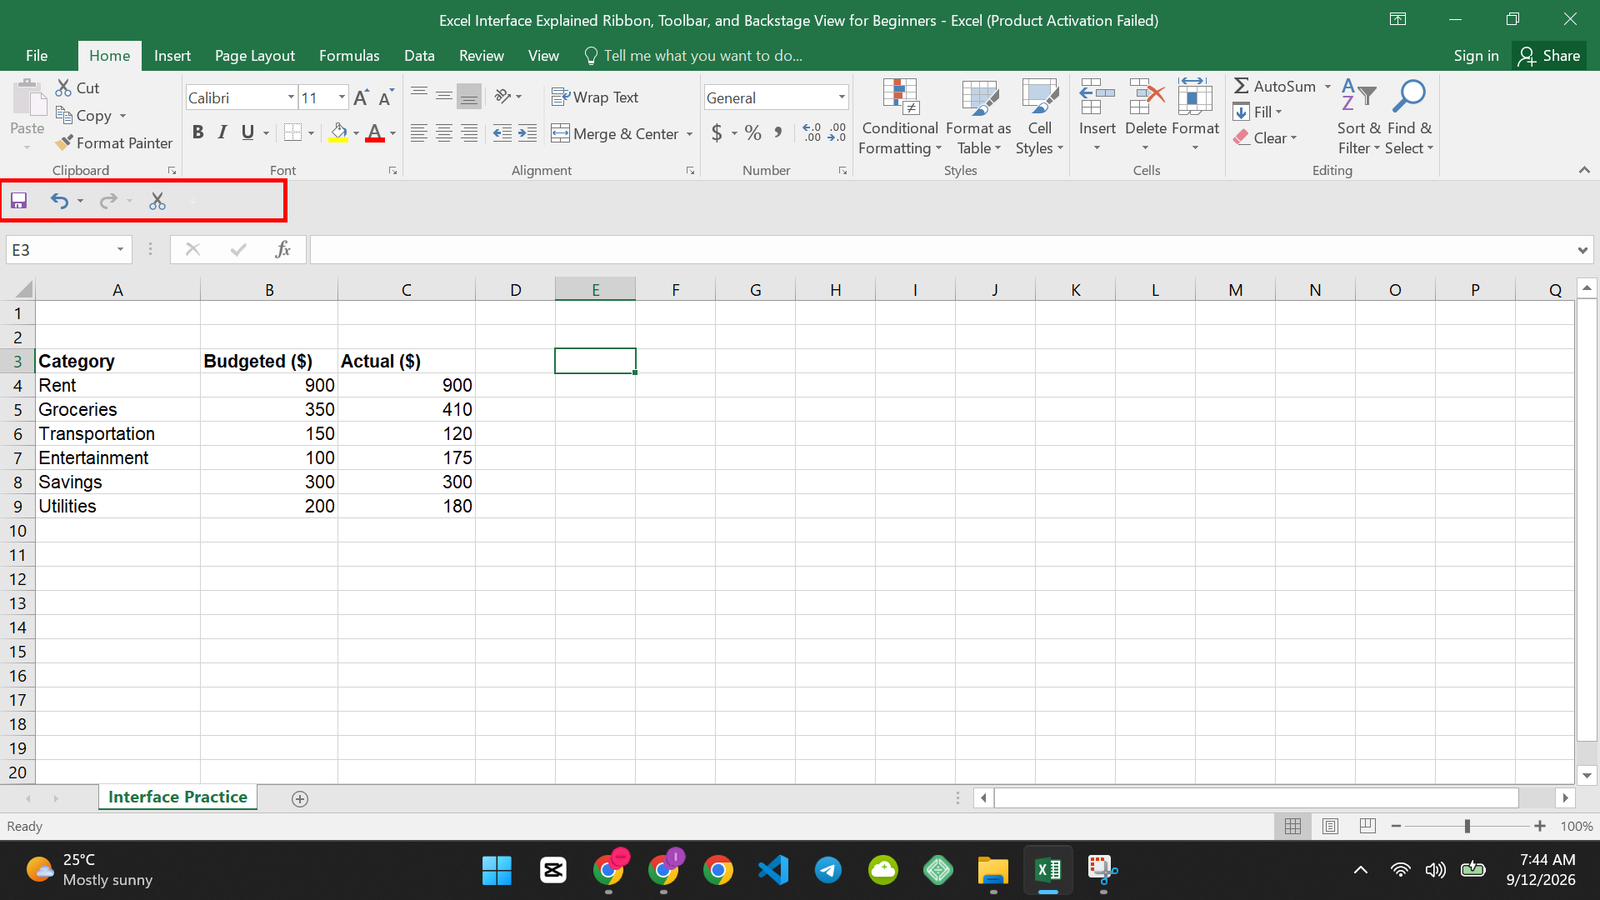
After clicking on the highlighted button in the above step, the Quick Access Toolbar will move below the Ribbon as seen below:
Common mistake: Pinning so many commands that the toolbar gets crowded and hard to scan. I’d keep it to the handful you truly use every single day.
2. Customize the Quick Access Toolbar: Right-click anywhere in the Quick Access Toolbar and click on Customize the Quick Access Toolbar
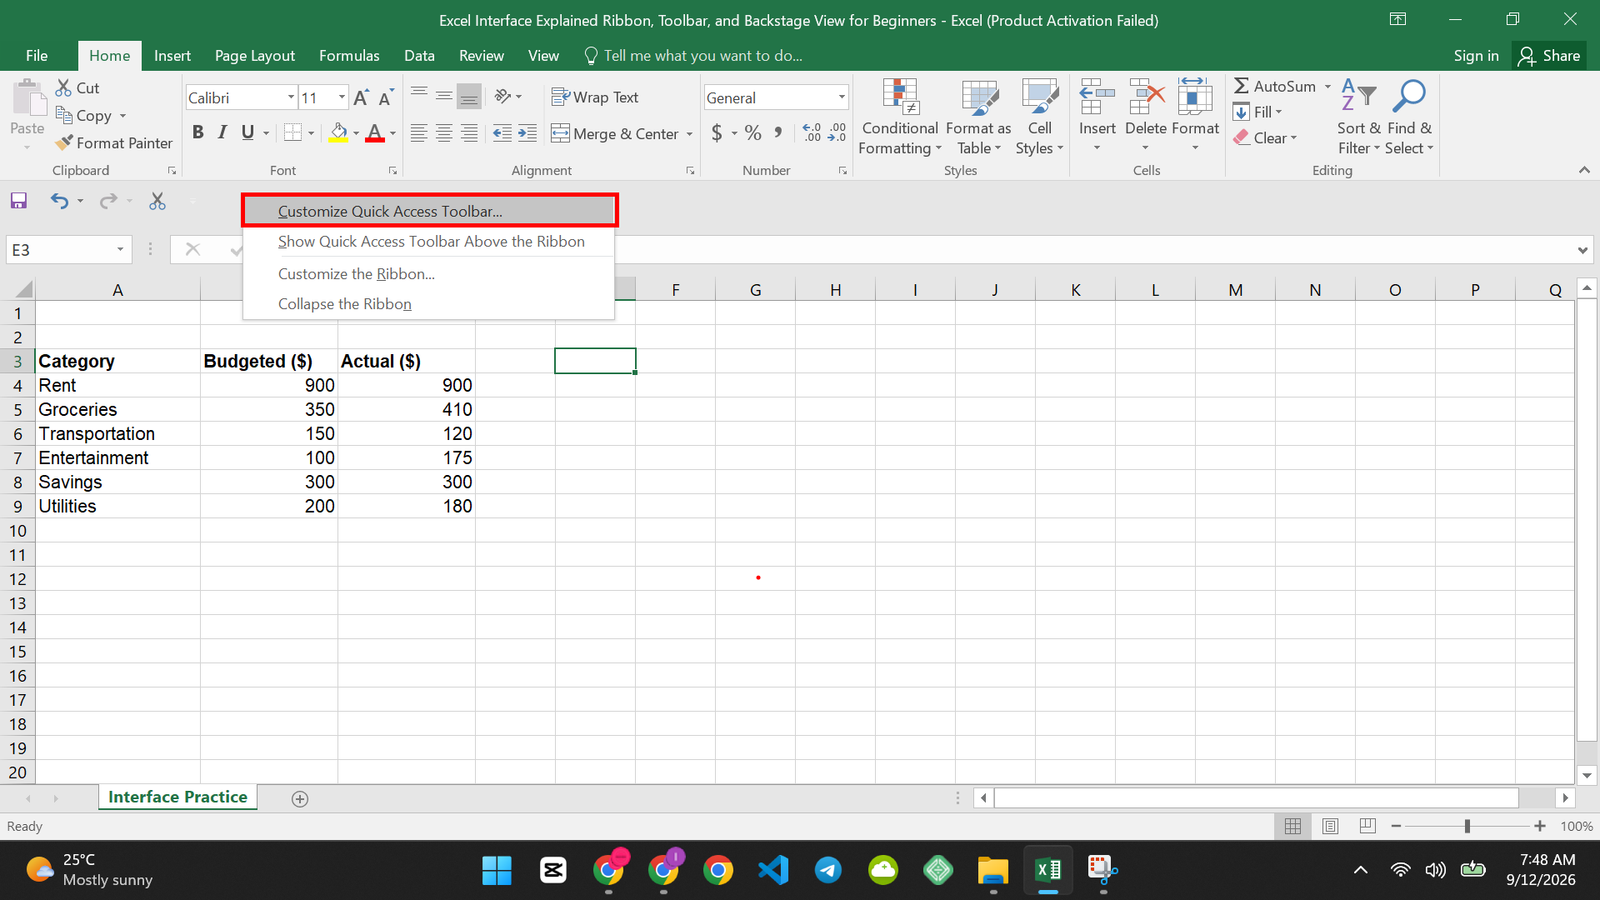
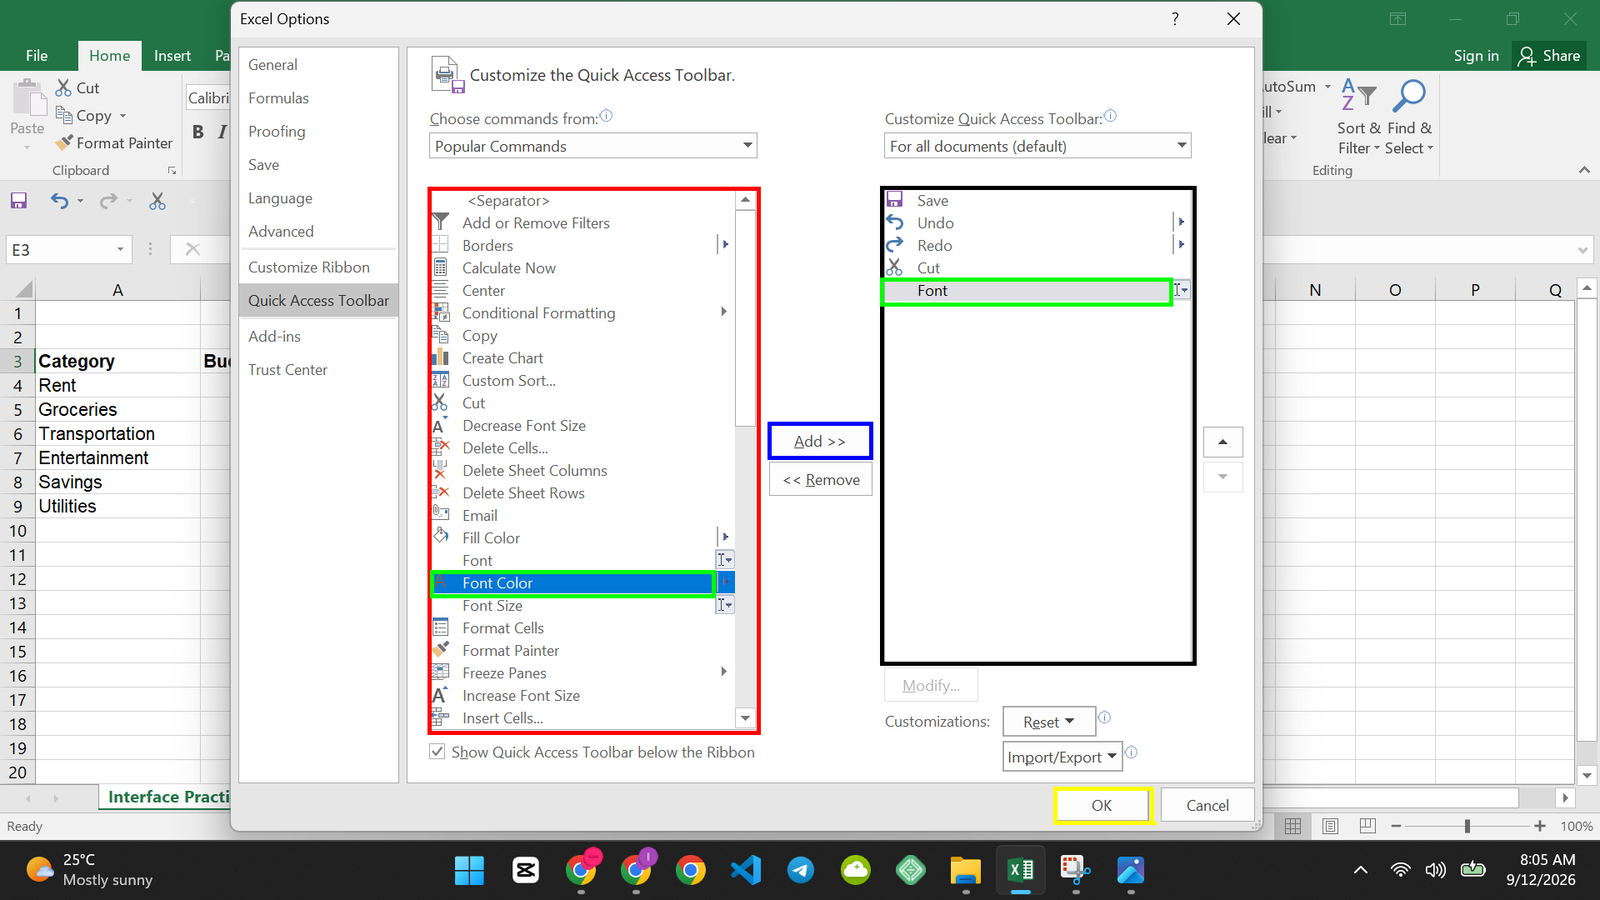
A dialog box will appear with Quick Access Toolbar selected and highlighted.
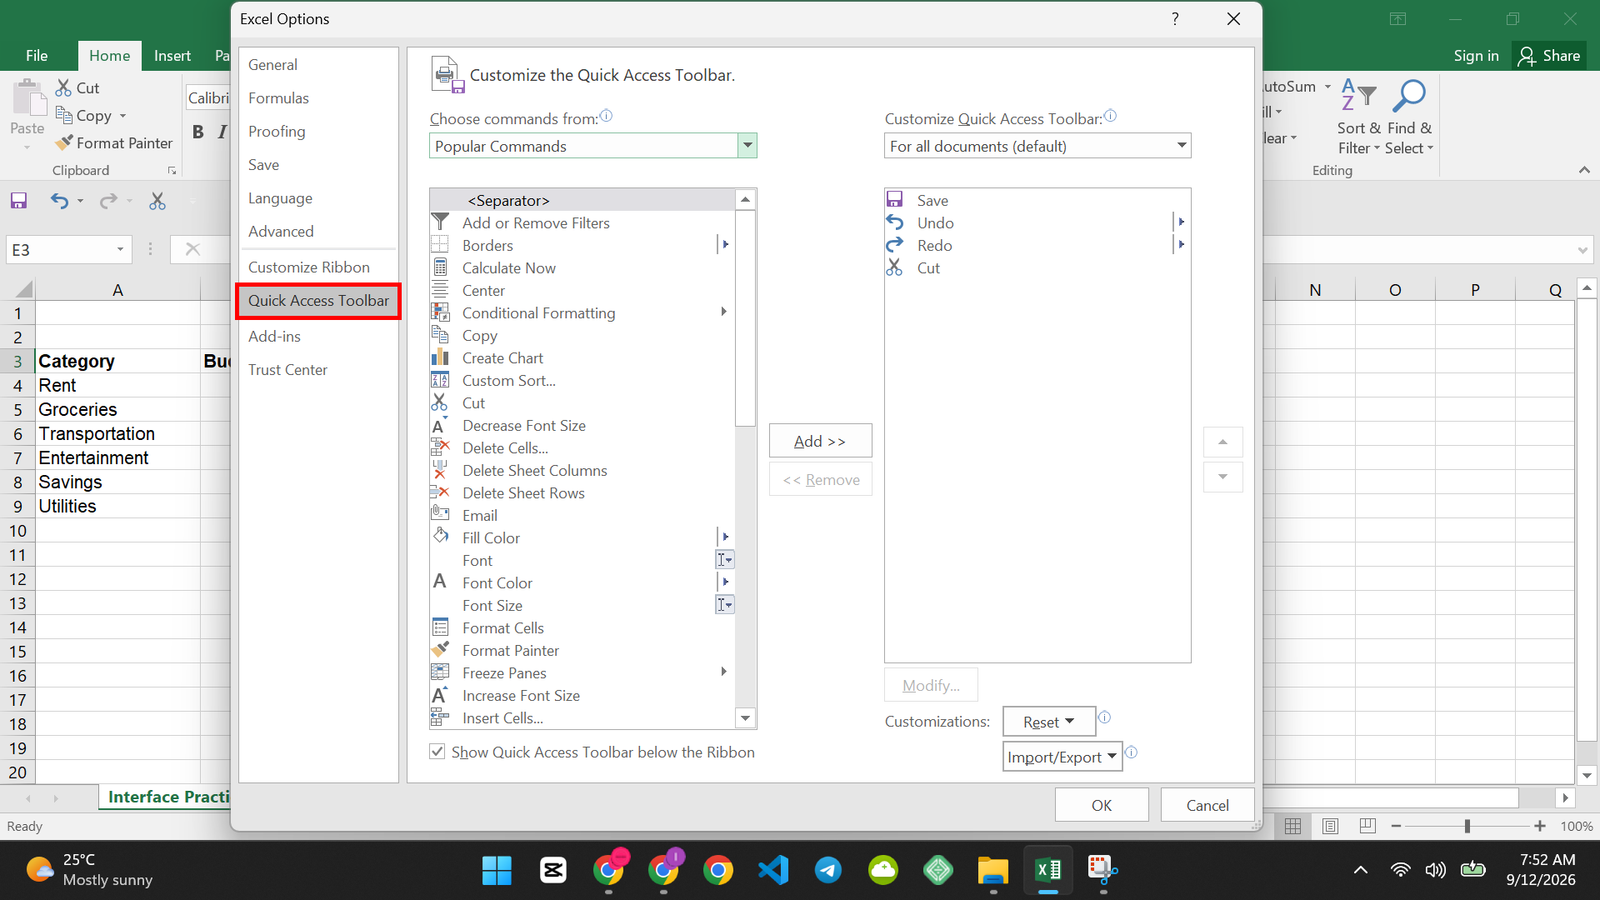
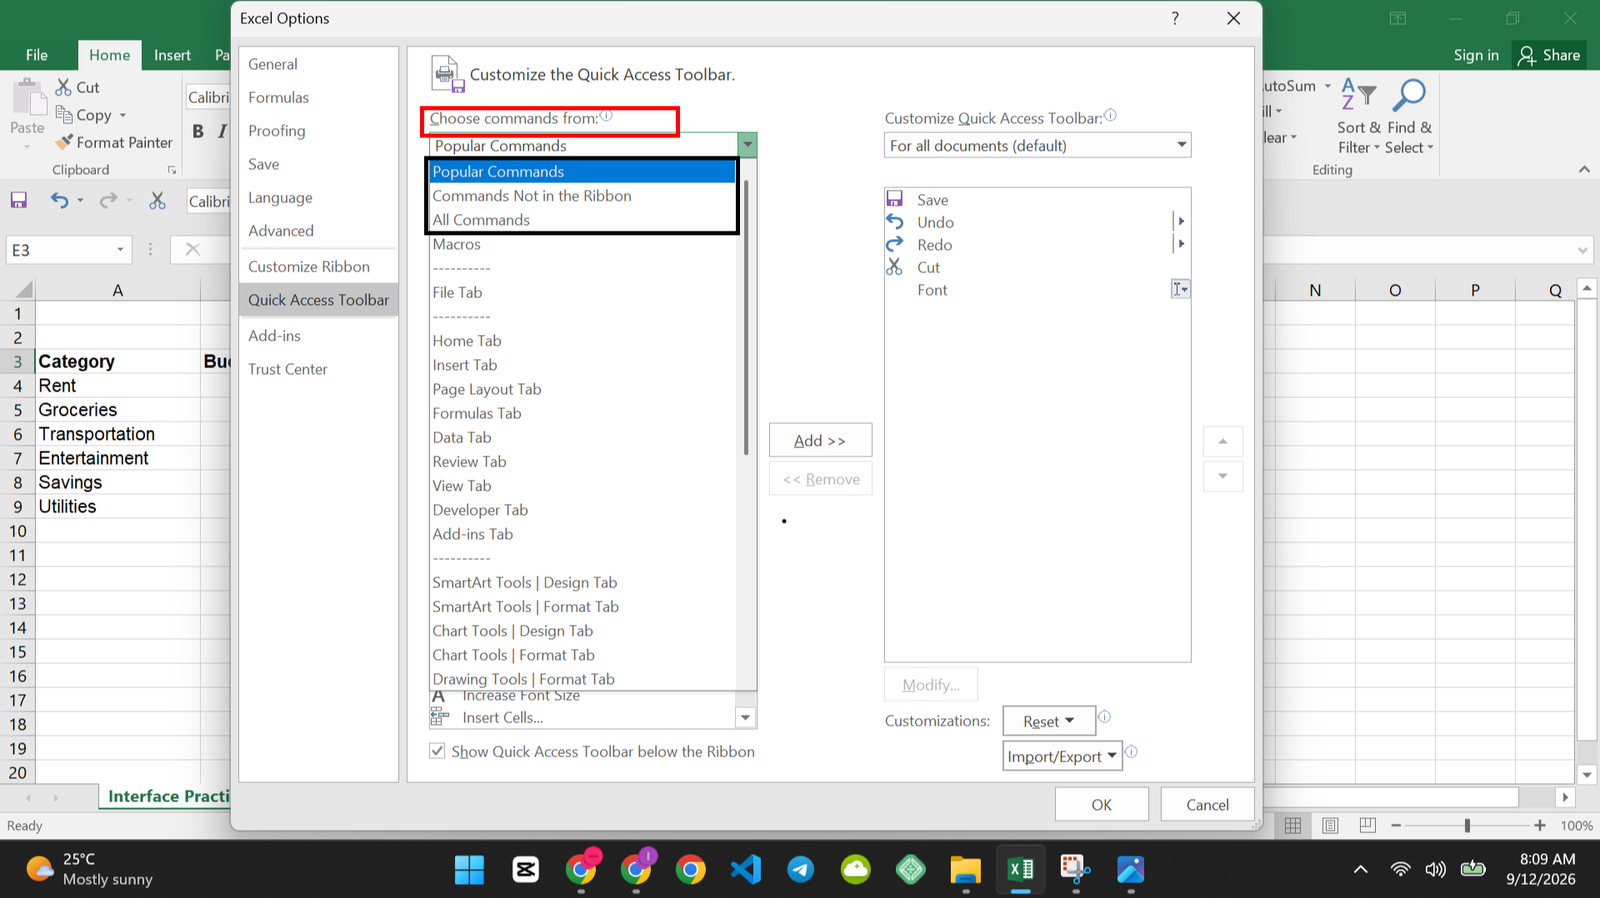
Under Choose commands from, select between popular commands, commands not in the ribbon, or all commands.
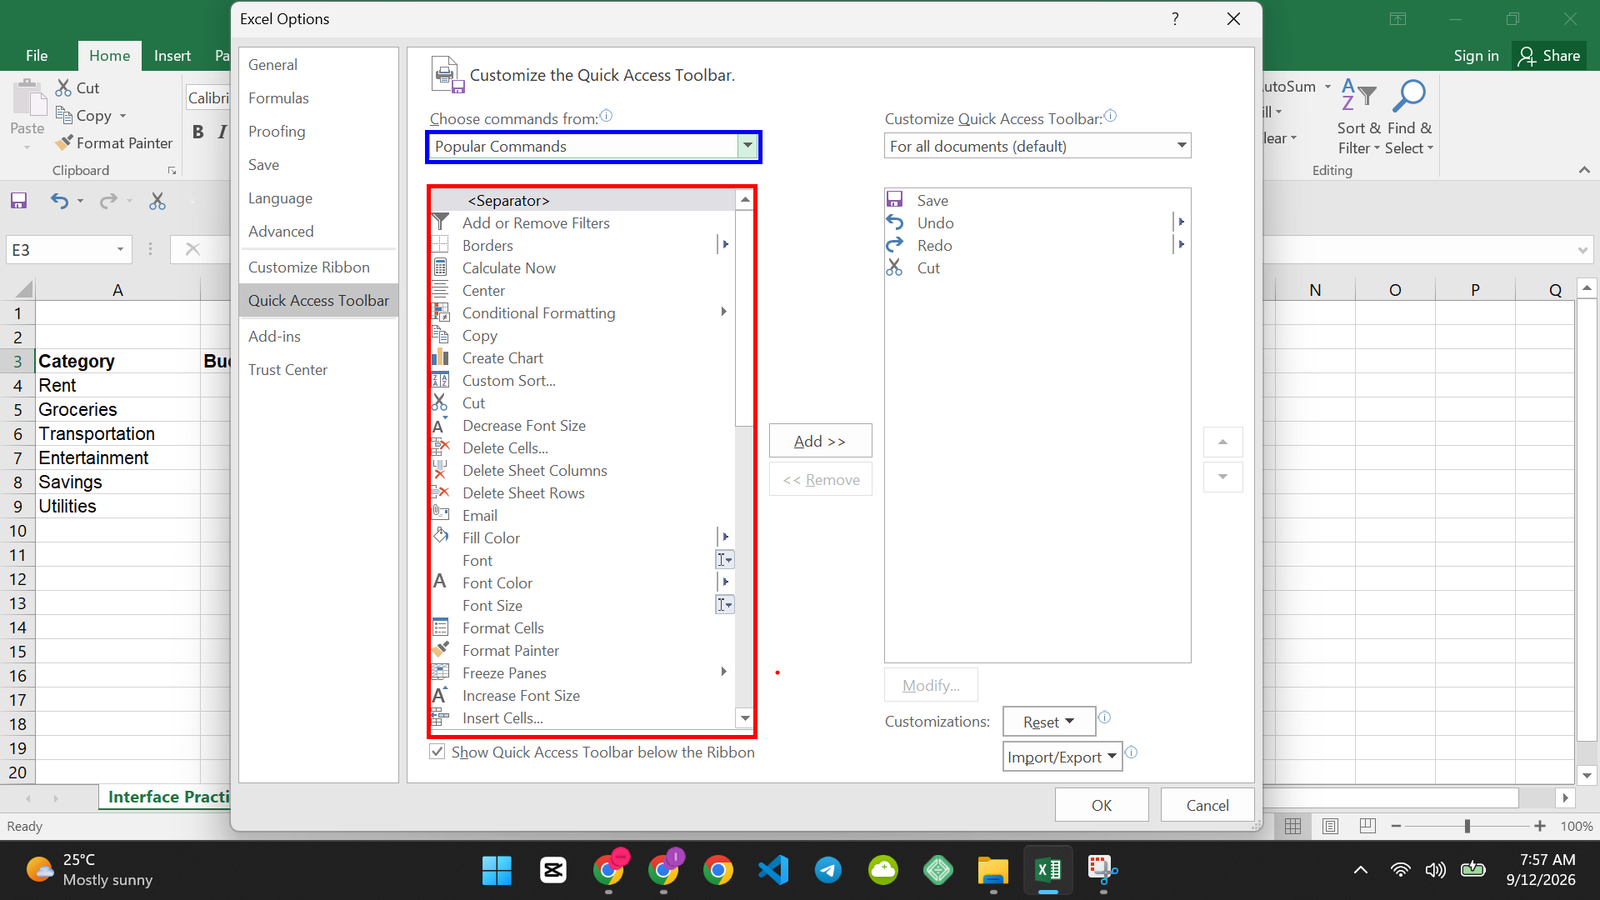
For most people, most of the commands necessary to perform your daily Excel tasks should be in the popular commands so click on it. You will see a list of popular commands in a box as highlighted in red in the screenshot below:
Select any command from the box then click on Add. For this example, I am selecting the Font command. After selecting your preferred command click on Add, then the command will appear at the box in the right end which holds all commands already in the Quick Access Toolbar, then click OK to close the Dialog box.
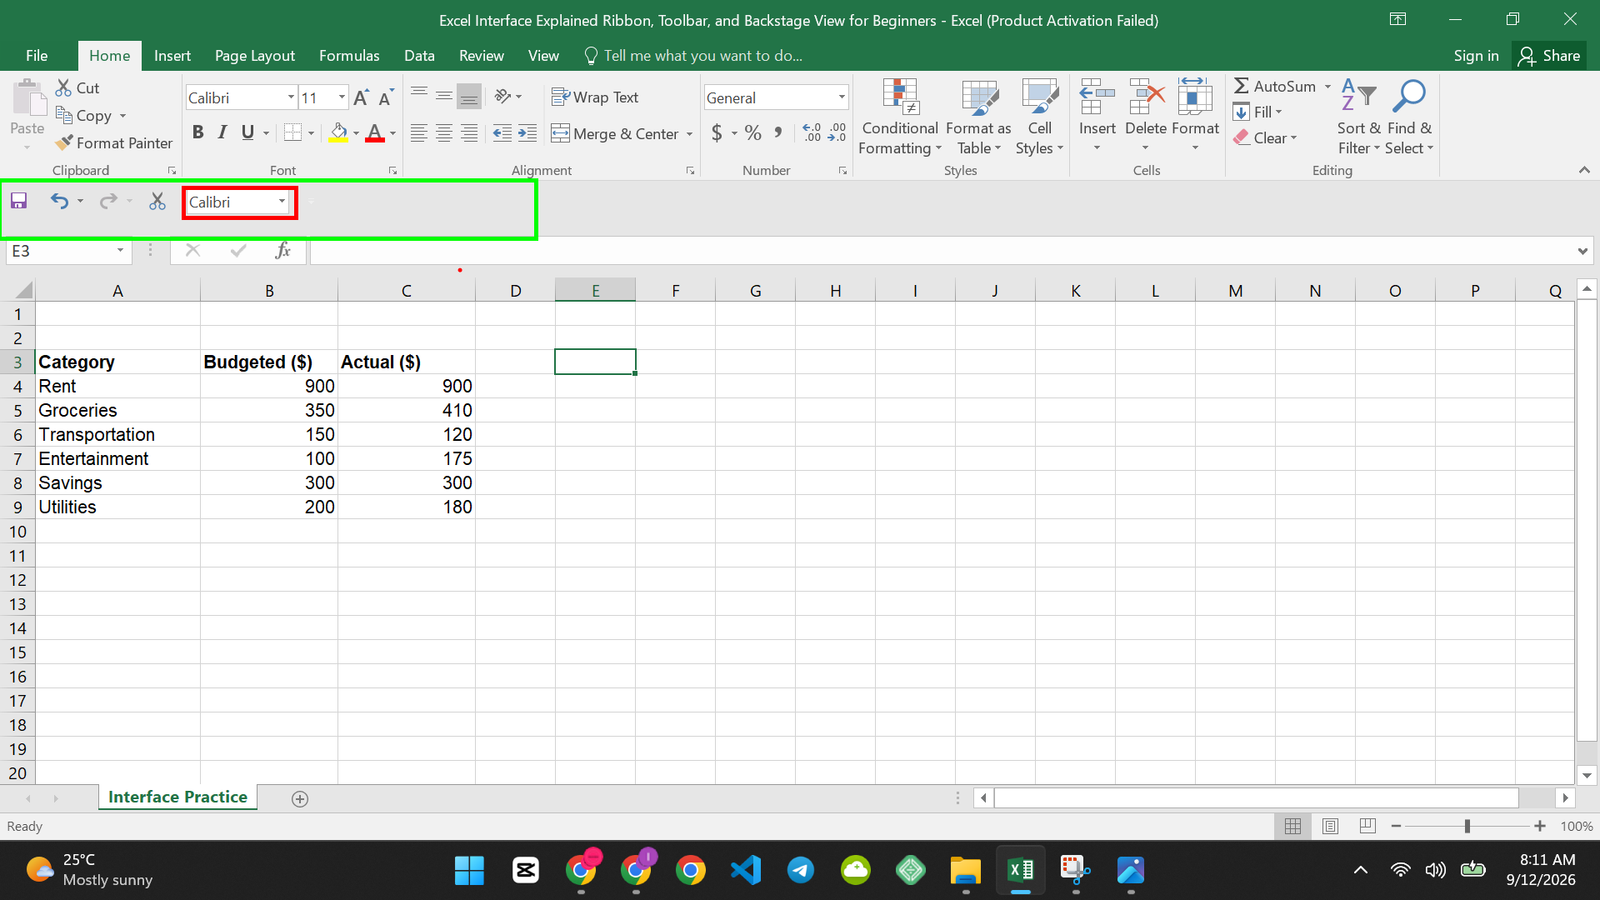
Finally, check your Quick Access Toolbar again and you will see the Font icon right there.
Step 4: Open Backstage View With the File Tab
What to do: Click the File tab. It sits at the far left of the Ribbon. This opens what Microsoft calls Backstage View. It’s a full-screen menu, separate from the regular Ribbon tabs.
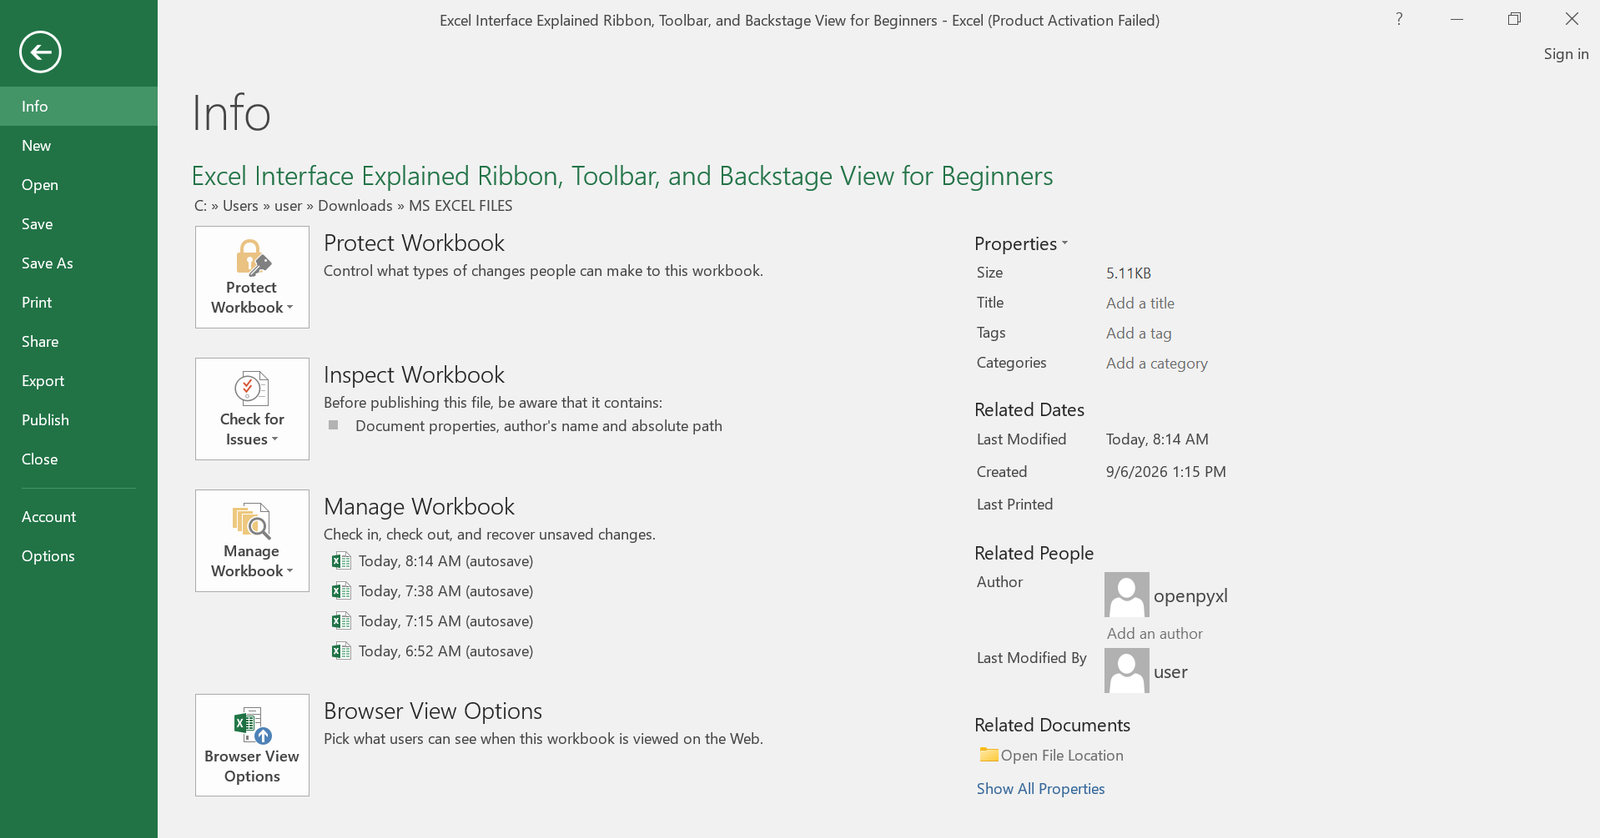
Why I’m having you do it this way: Backstage View is where file-level tasks live. Save, Save As, Open, Print, and Info all sit here. The regular worksheet grid disappears. A full-screen menu replaces it. Save, Save As, Open, Print, and Info are listed down the left side.
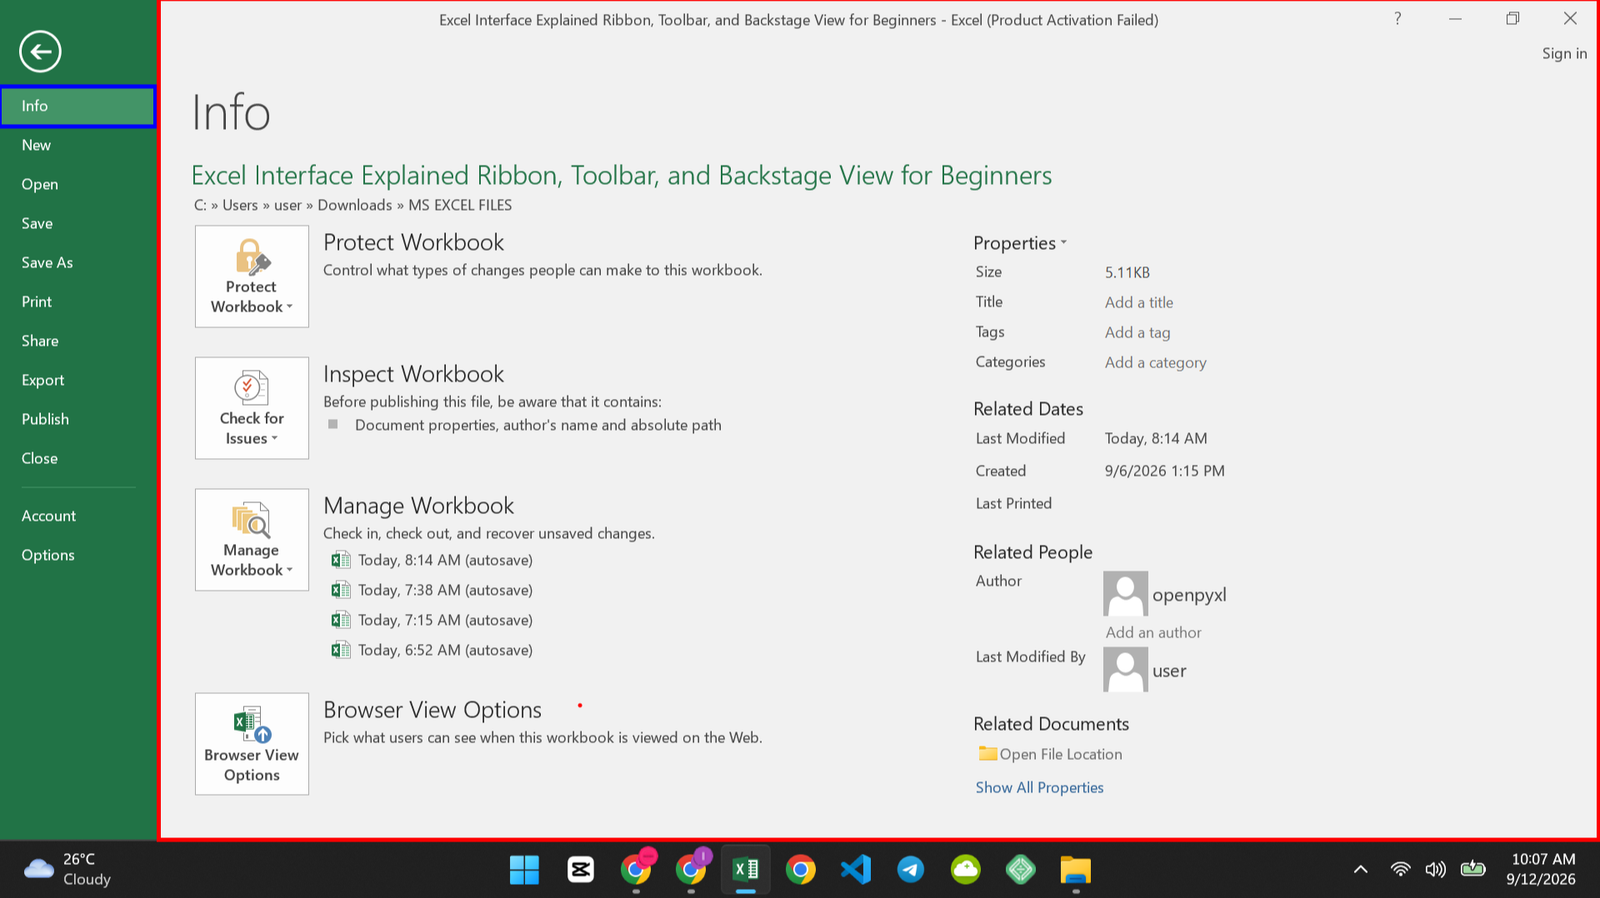
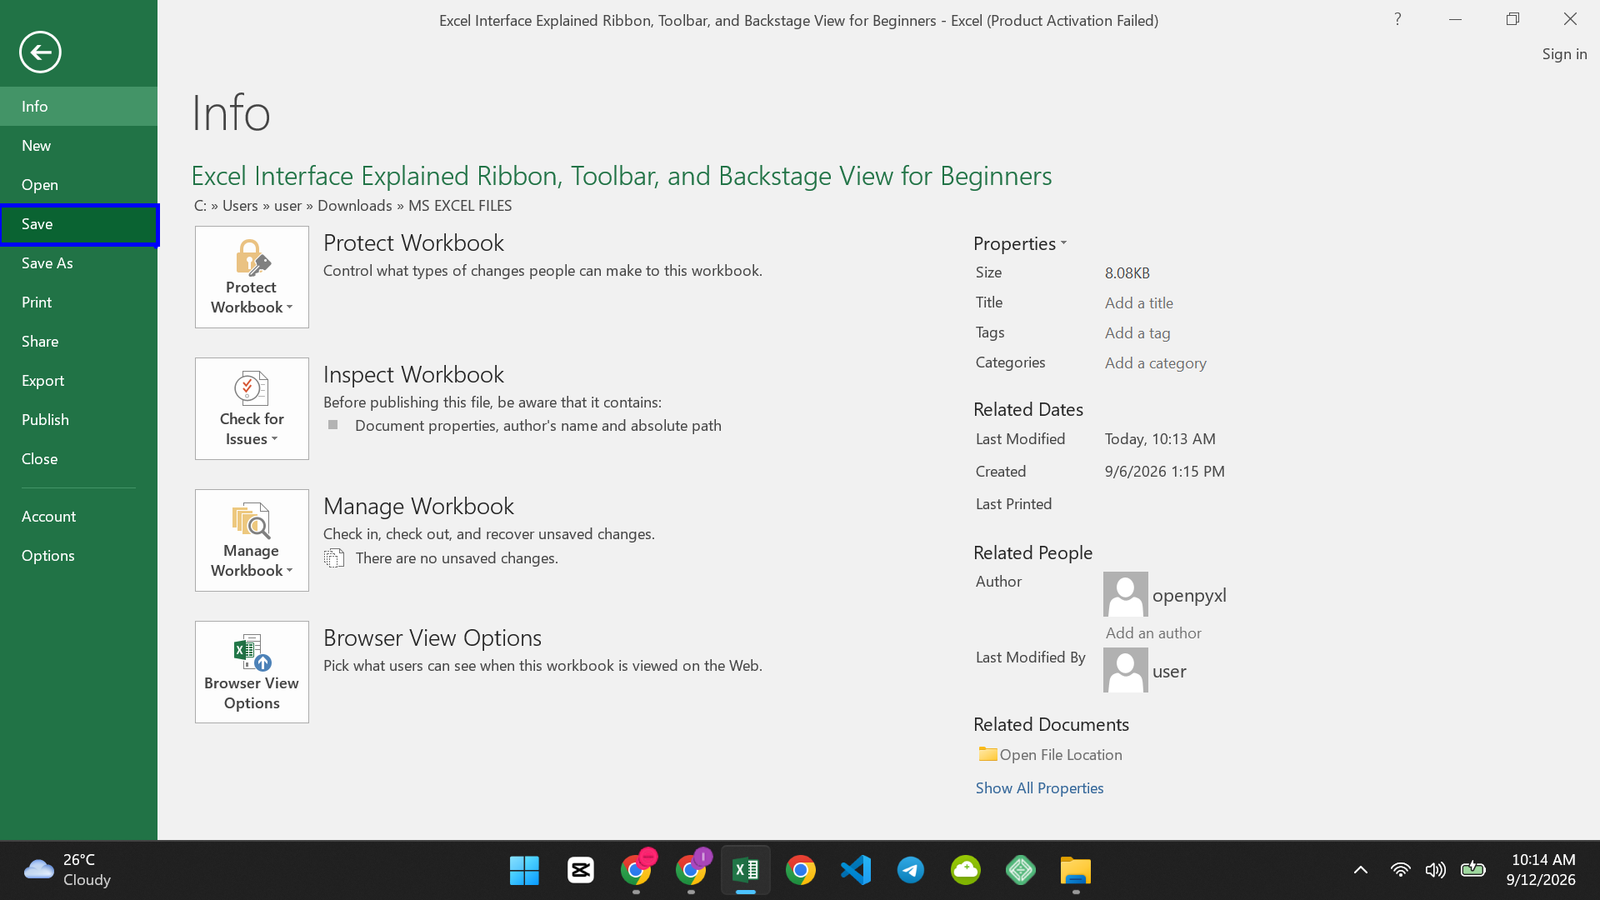
Info: This is where you check details about the file you’re working in right now. You can come here to protect a file with a password, mark it as final, check it for hidden data before you share it, or just see some quick stats about it.
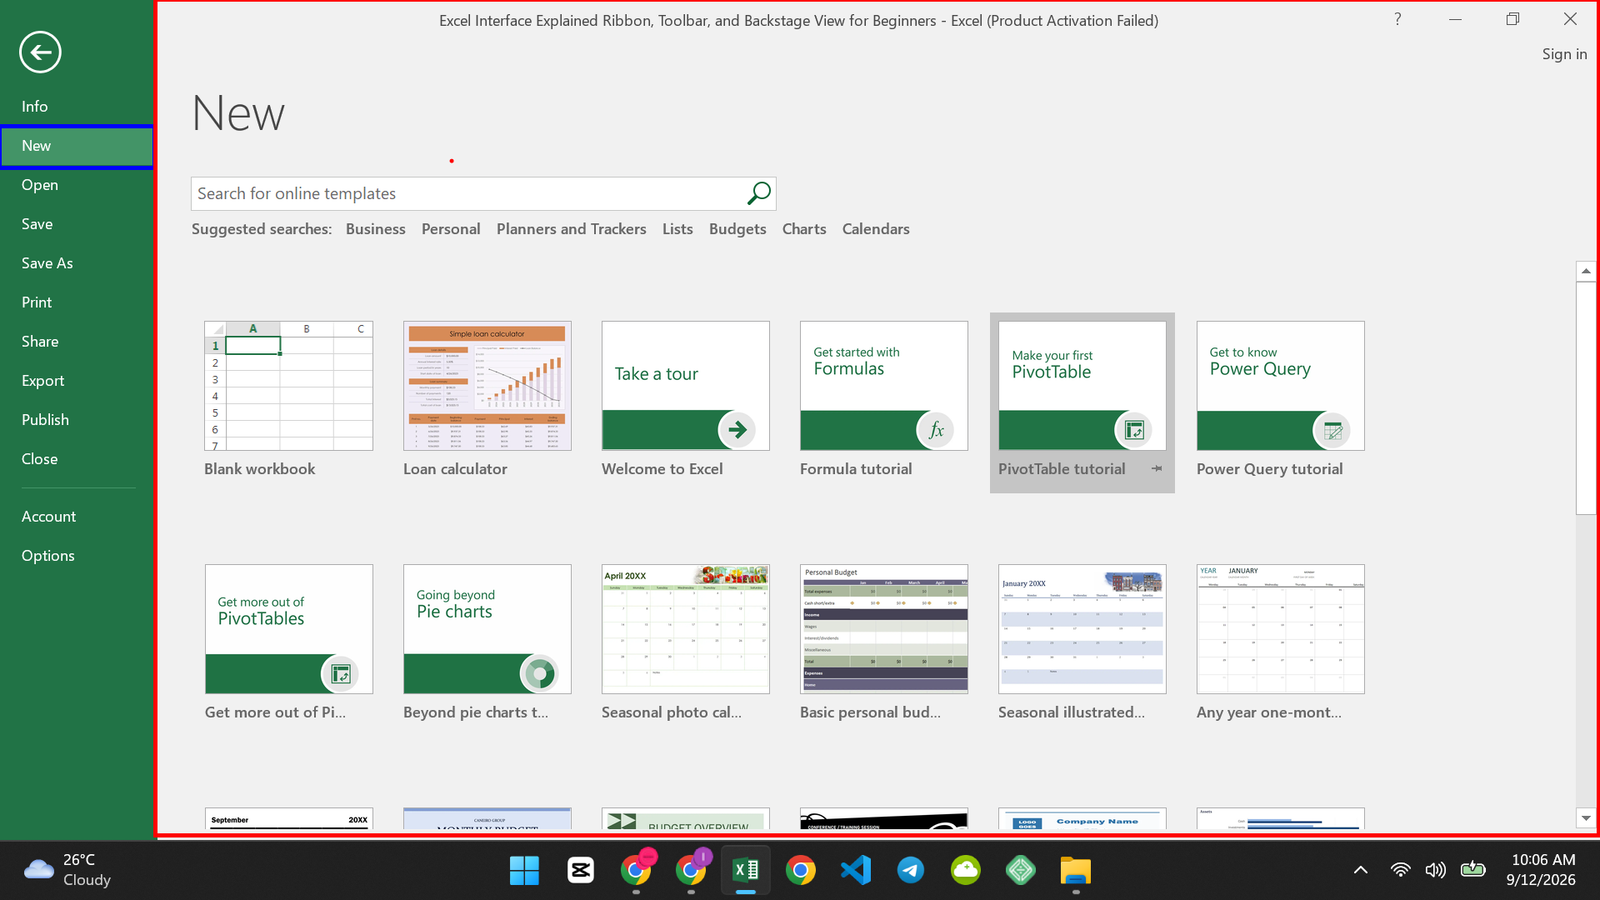
New: This is where you start a blank workbook. Come here whenever you want a fresh sheet, or if you’d rather pick from one of Microsoft’s ready-made templates instead, like a budget or a calendar.
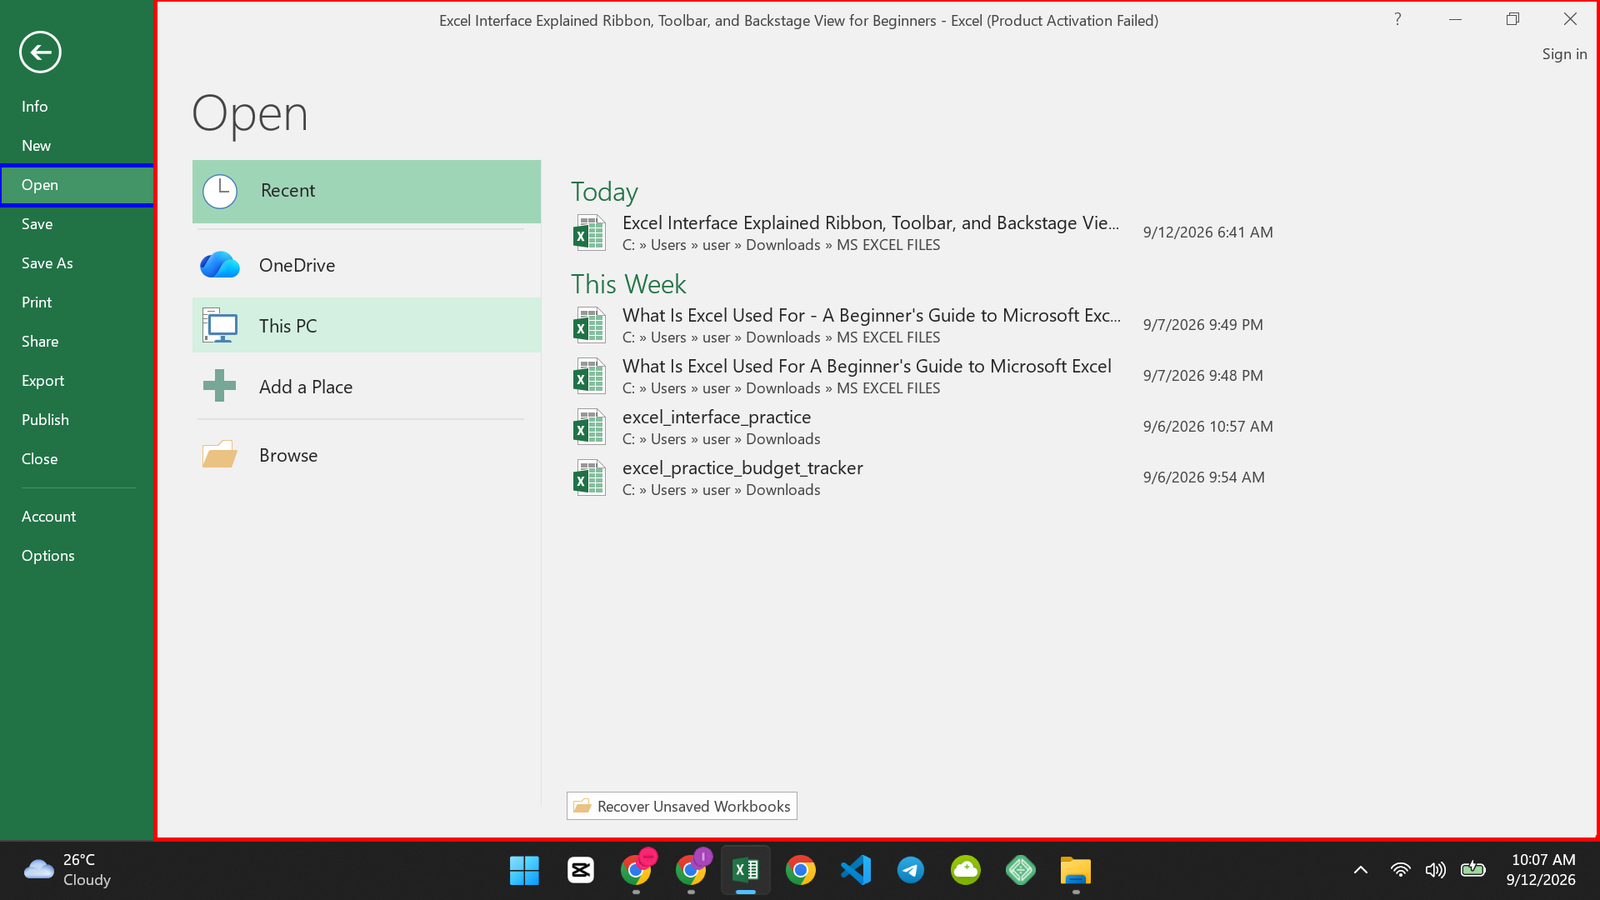
Open: This is where you open a file that already exists. You’ll see your recent files first, then you can browse to OneDrive or your computer if what you need isn’t there.
Save: This just saves your file, right where it already is, under the name it already has. You’ll use this one the most. Once you click on the Save button, it will save your work and take you back to the file in Excel where you can continue working on your task.
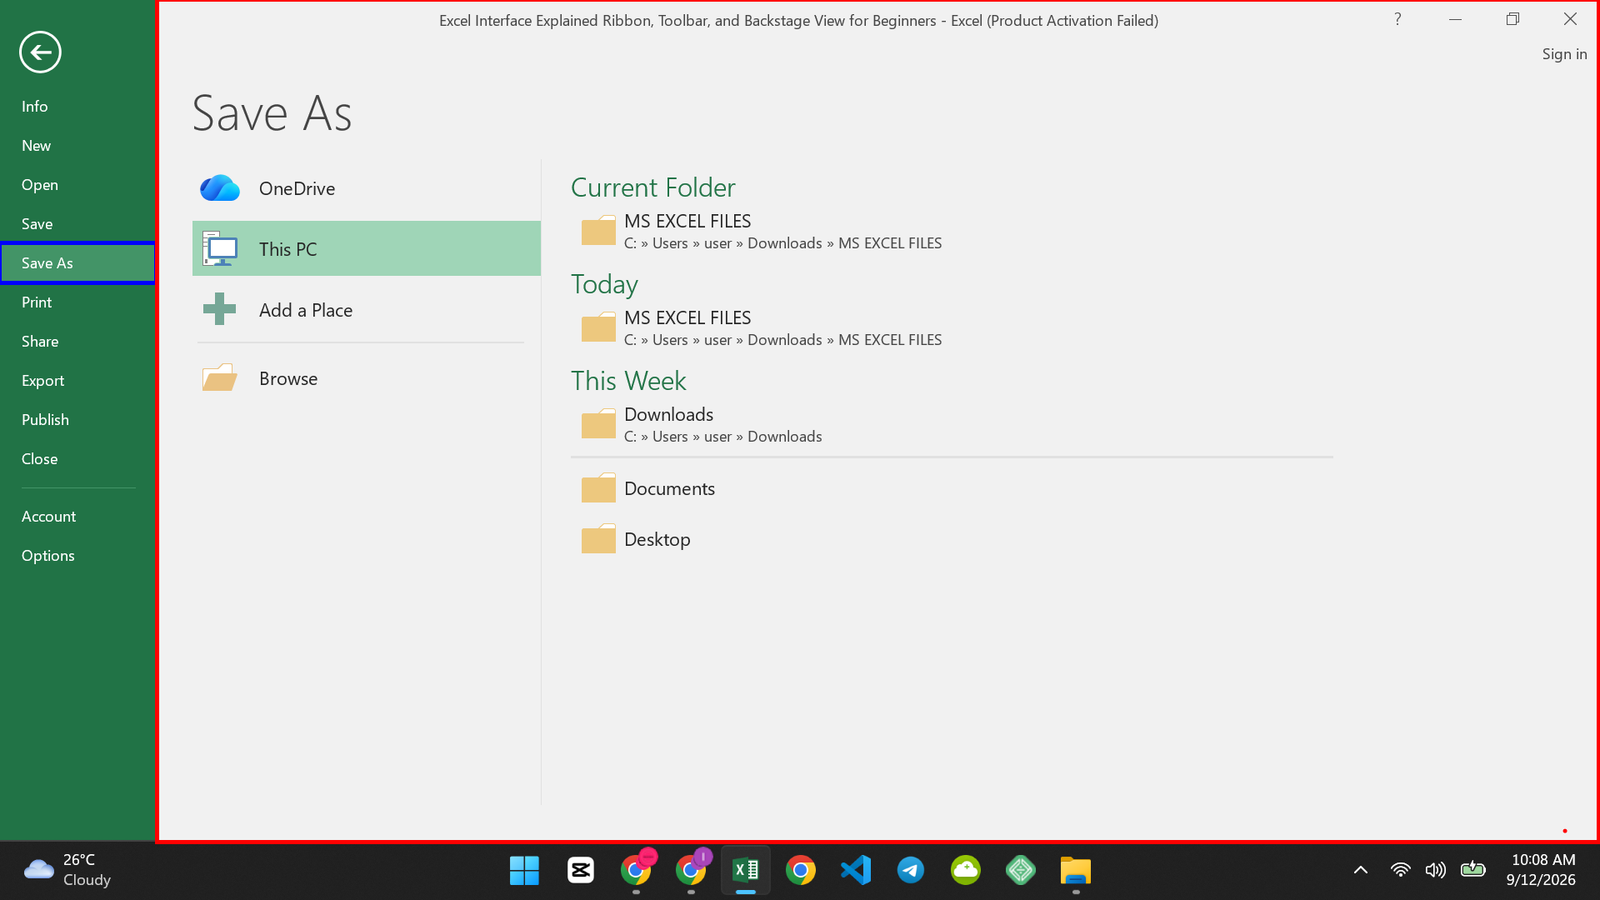
Save As: This is where you save a copy under a new name, in a new location, or as a different file type. Use this when you want to keep your original file untouched and start a new version from it.
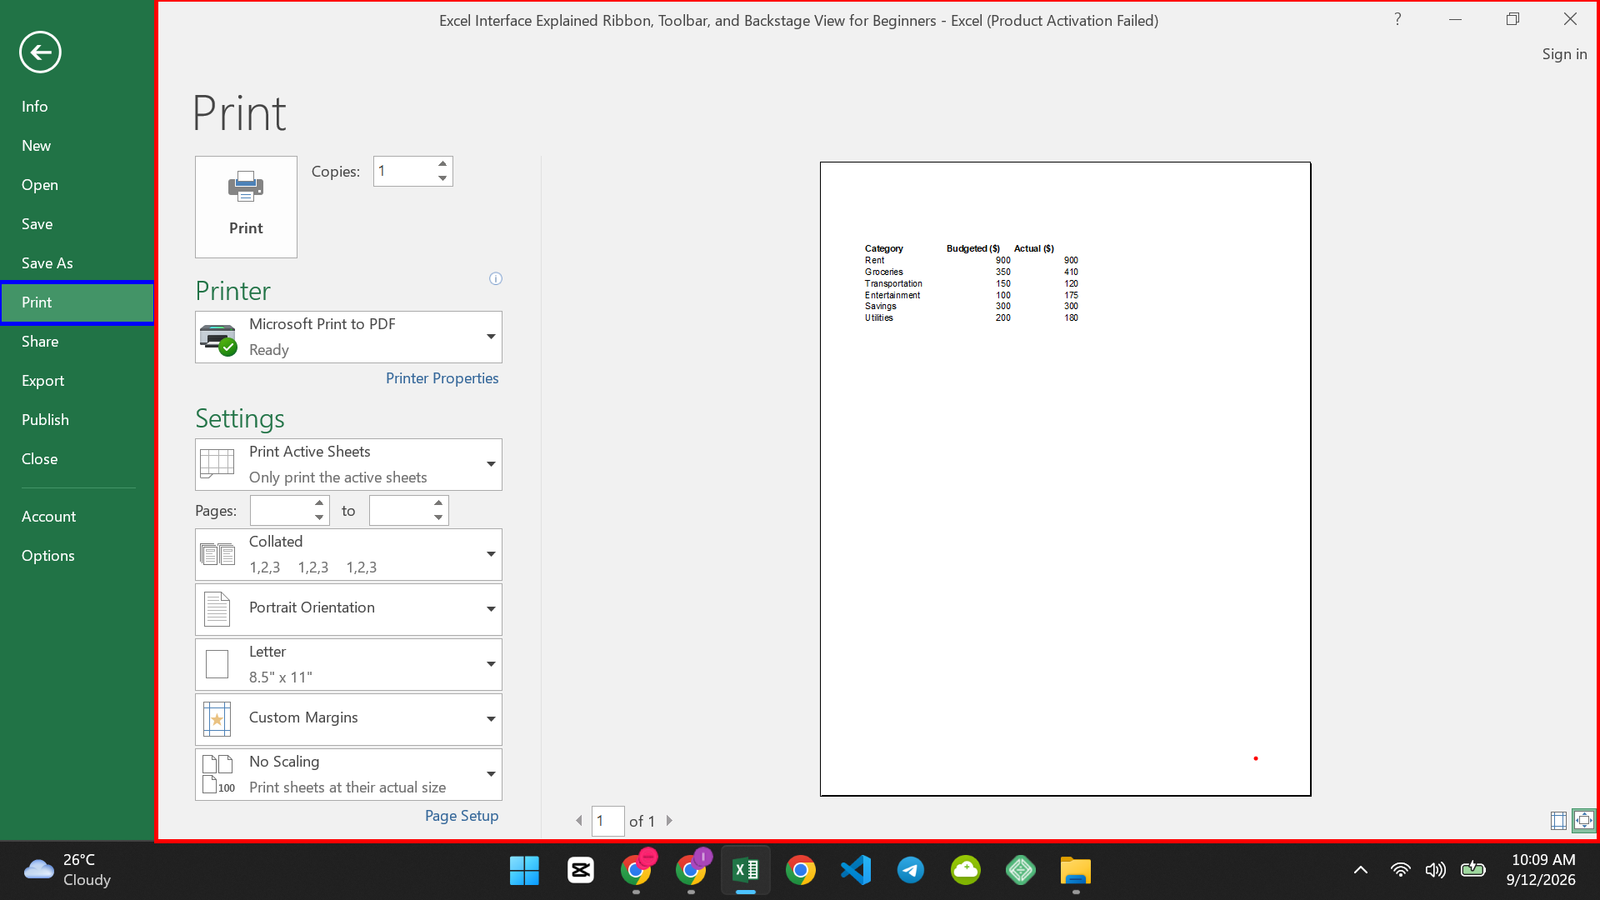
Print: This is where you get your file ready to print. You’ll see a live preview here, plus your printer choice, page range, and margins, all before anything actually prints.
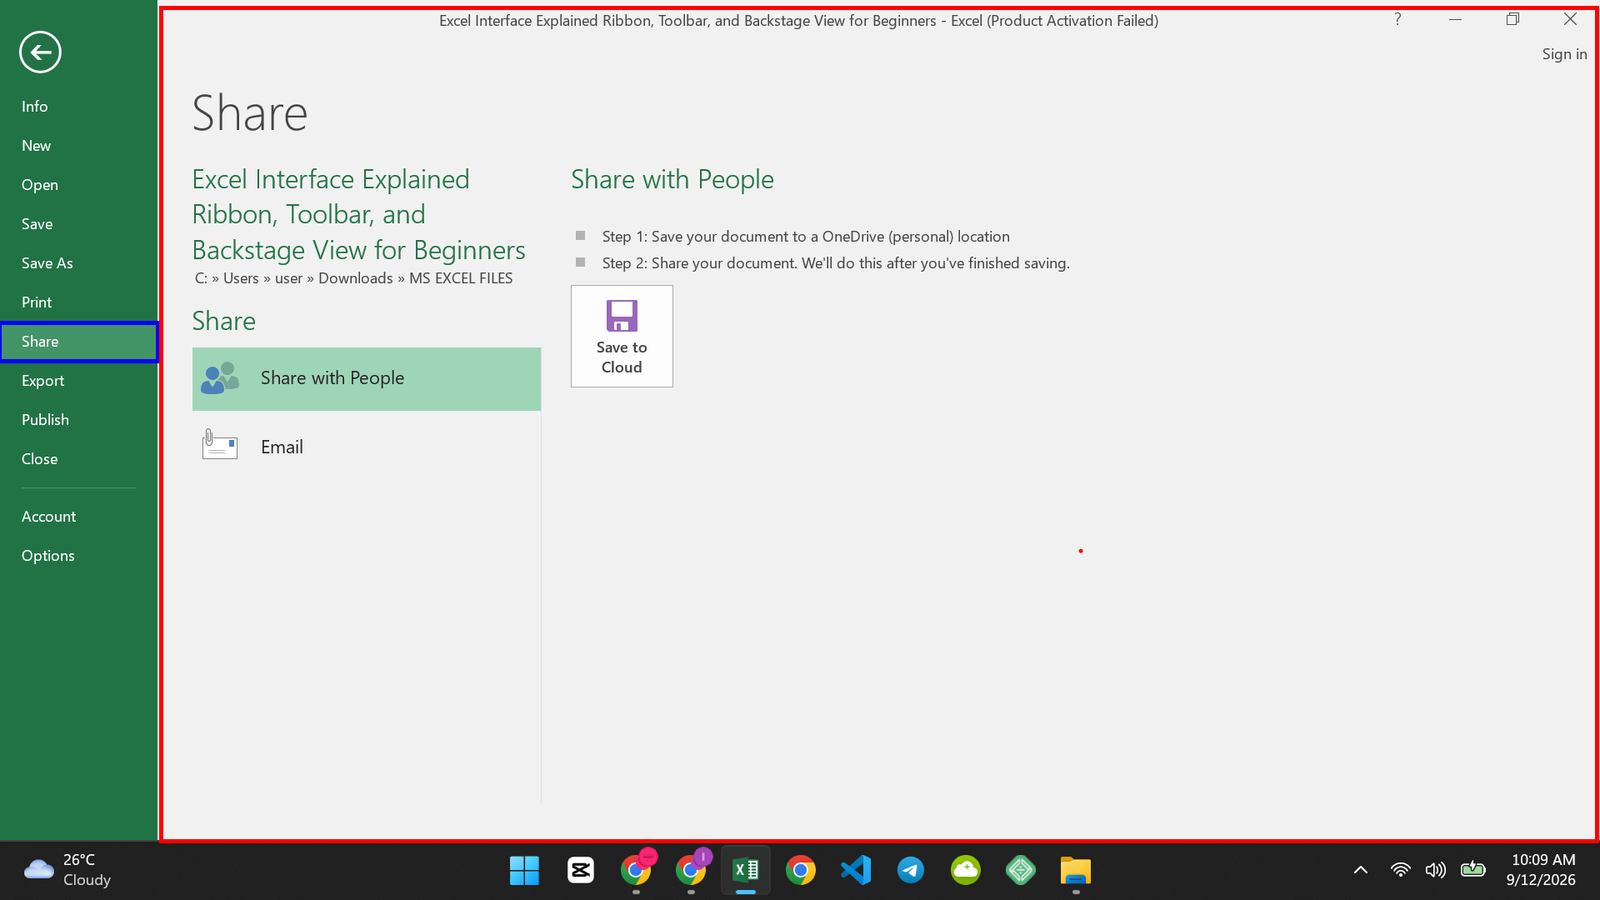
Share: This is where you send the file to someone else to work on together. Click here when you want to share a link instead of emailing an attachment.
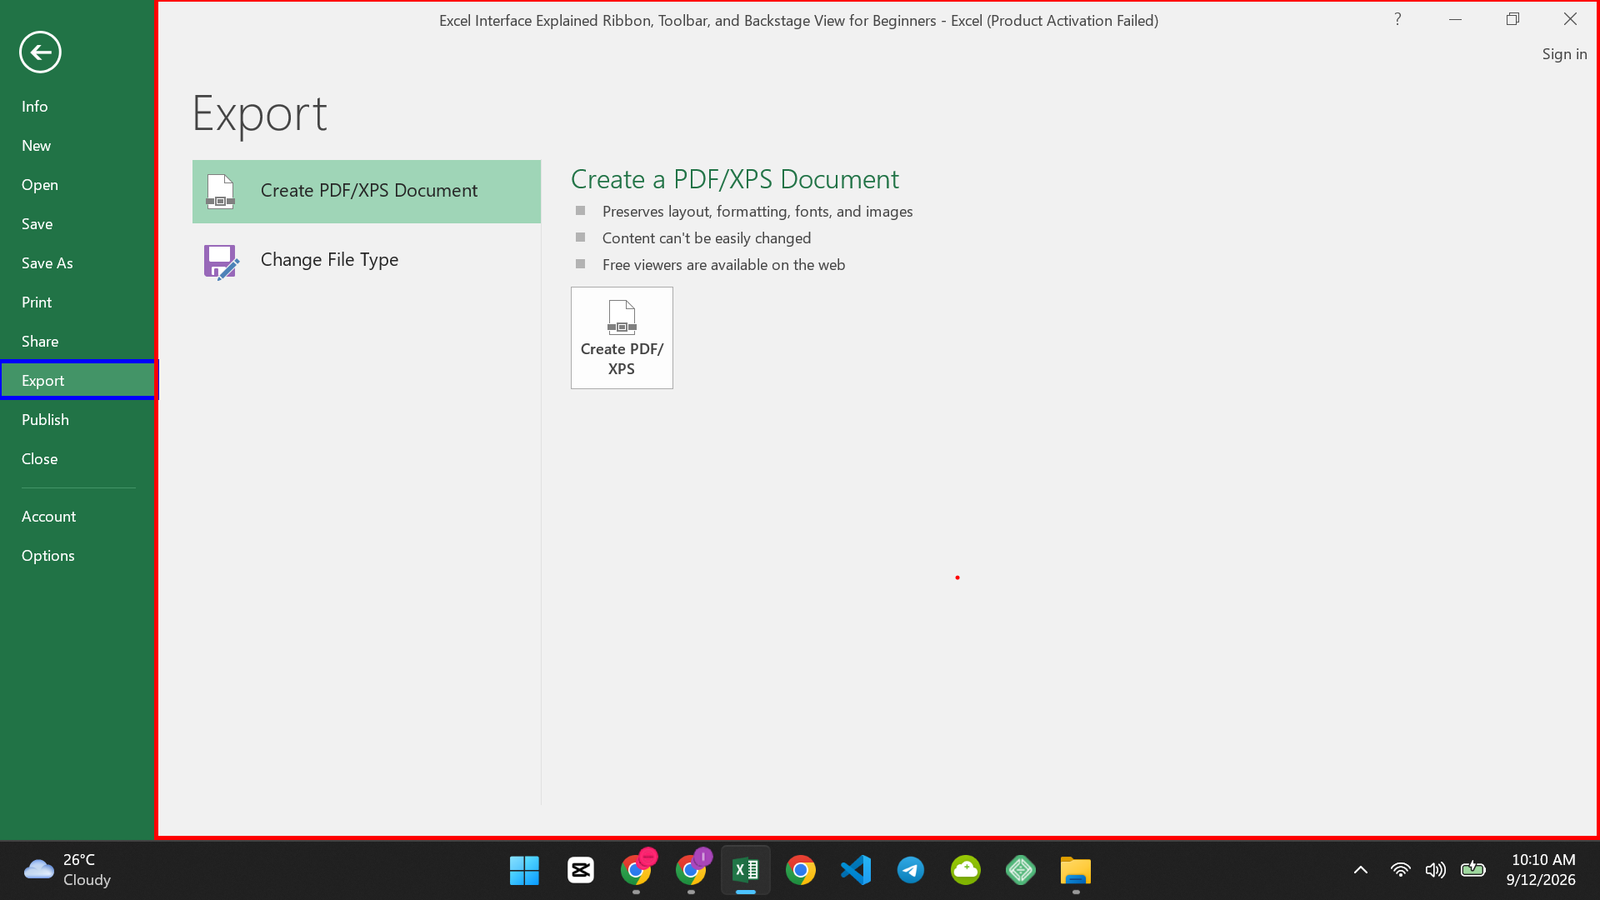
Export: This is where you turn your workbook into something else, like a PDF. Use this when someone needs to see your file but doesn’t have Excel.
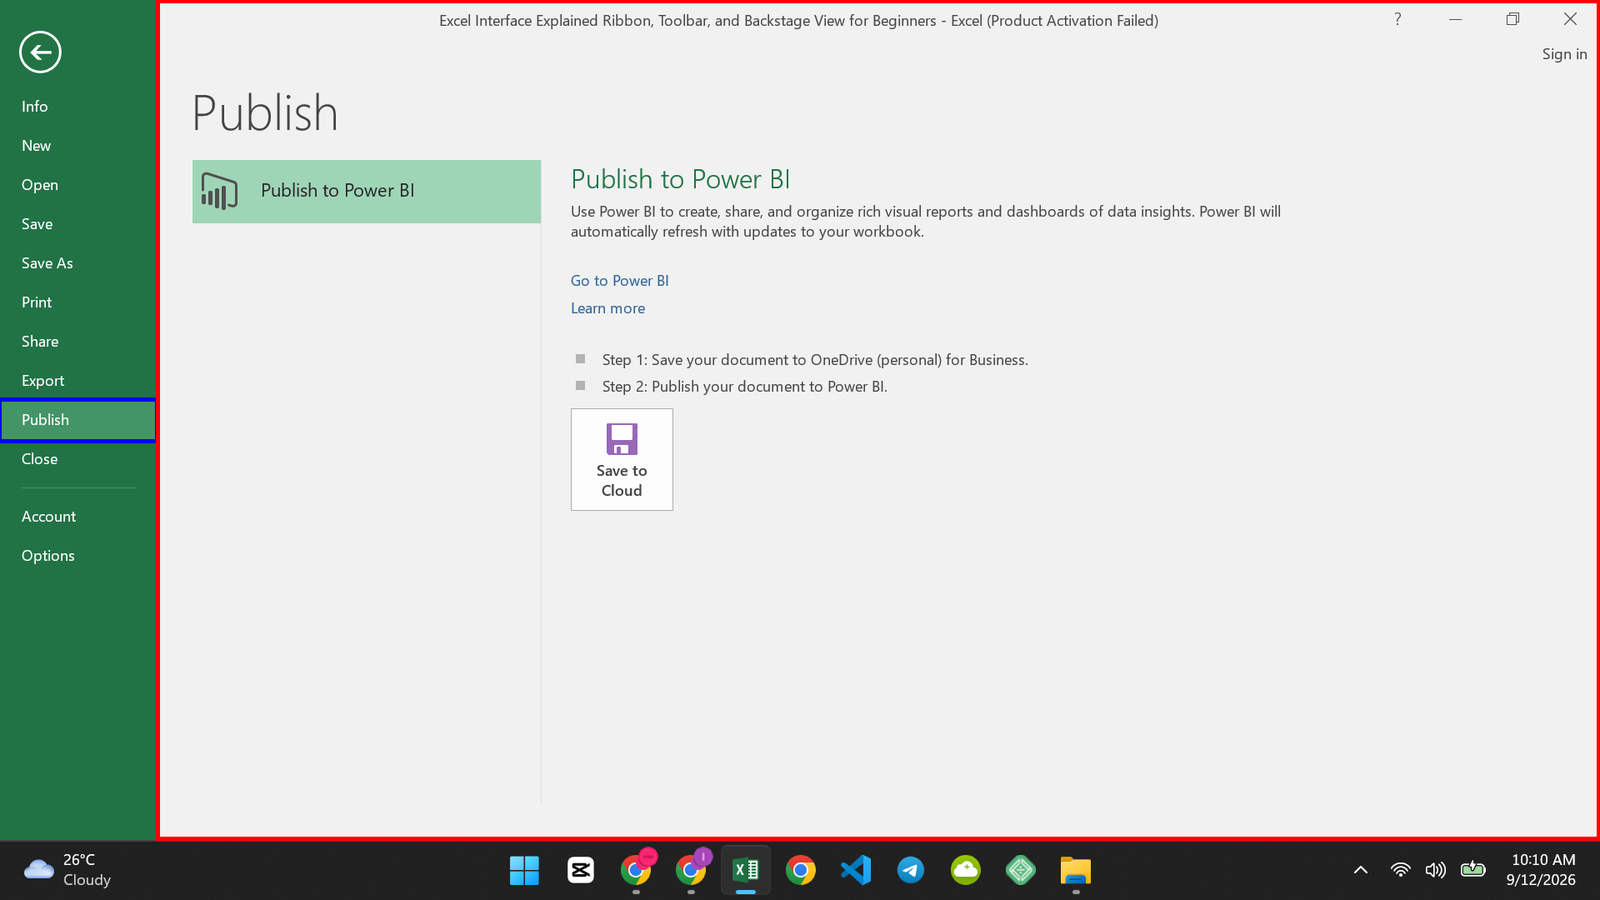
Publish: This is where you send your workbook to Power BI, so you can build reports and dashboards from it there. Use this when you want your data to live somewhere bigger than just this file.
Close: This just closes the file you’re looking at.
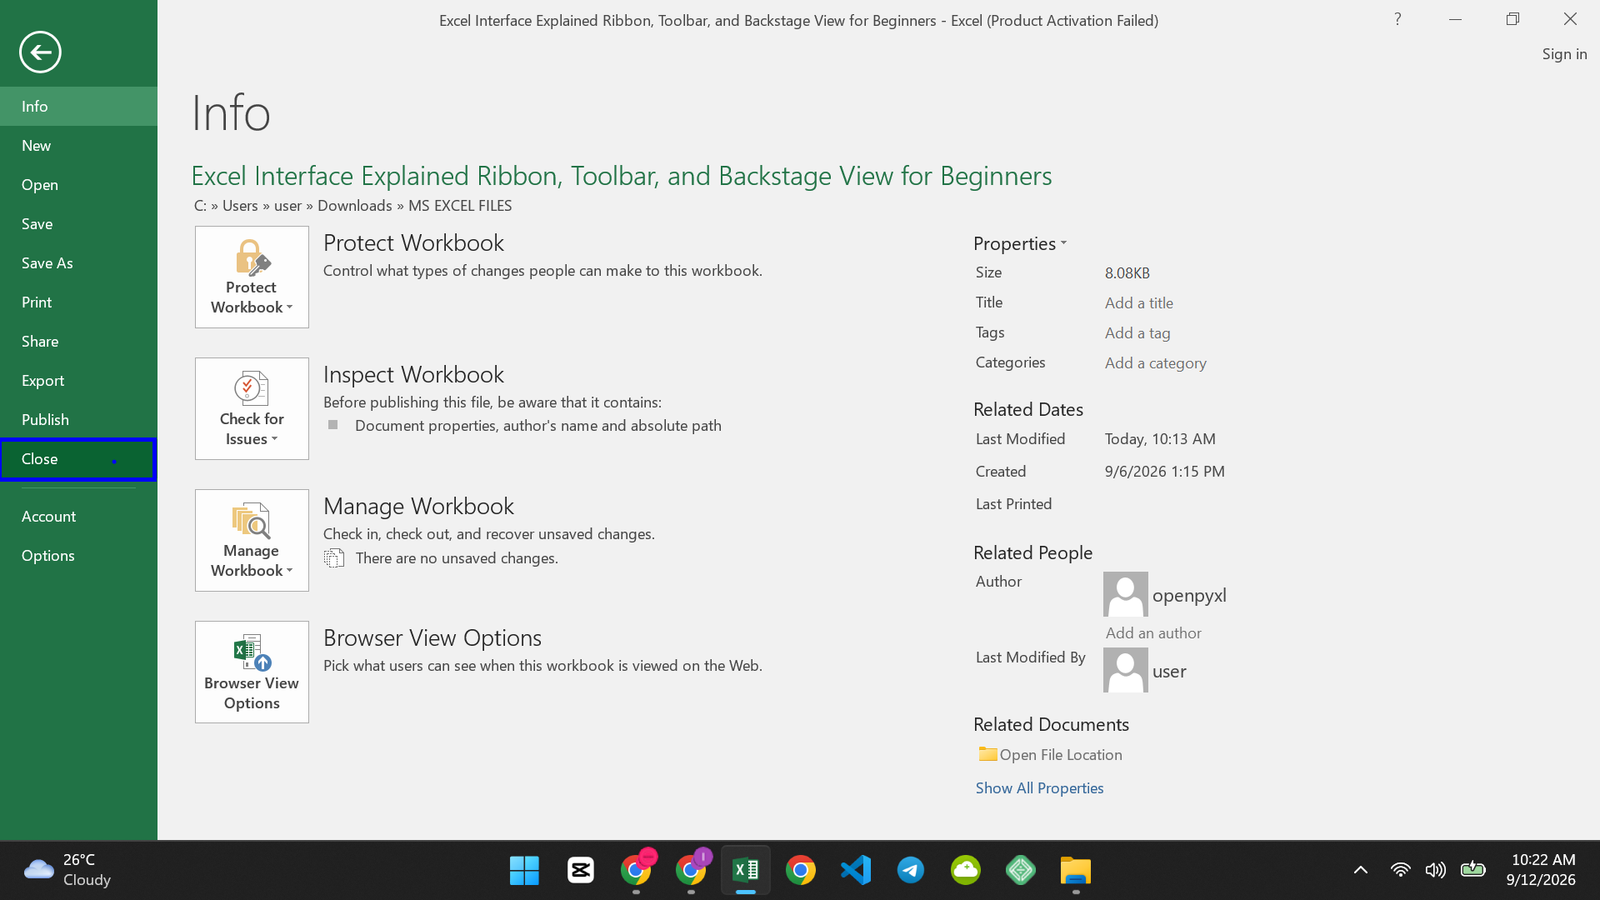
Notice it doesn’t close Excel itself, just the one workbook you are working on.
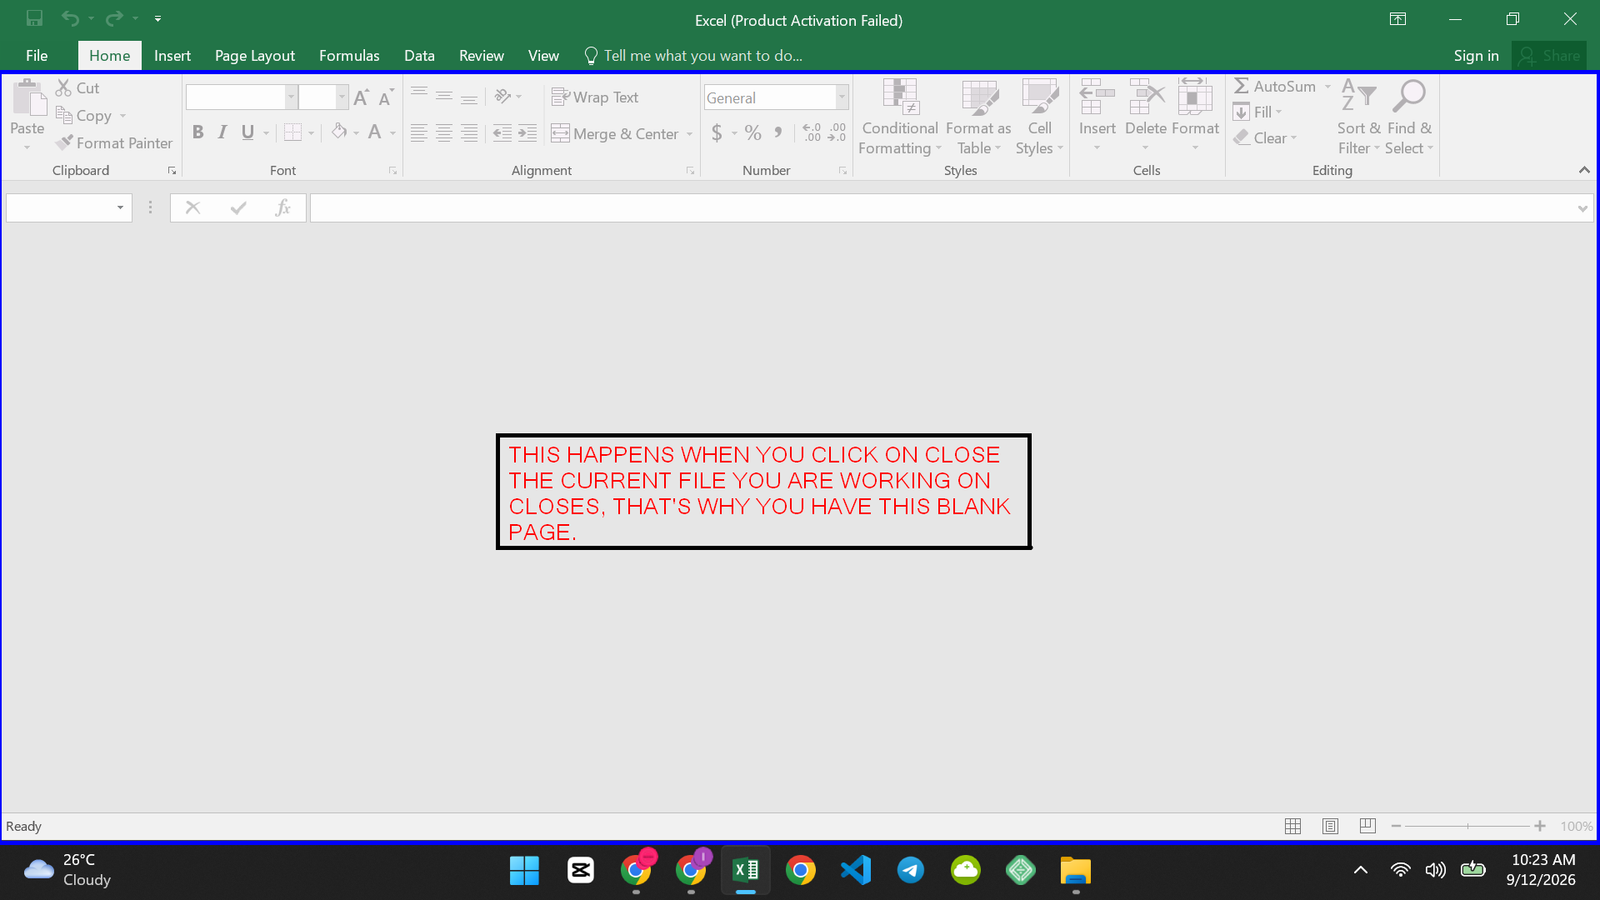
Account: This is where your sign-in info lives. Come here if you need to check which Microsoft account you’re logged into, or change how Excel looks.
Options: This is the one with all the deeper settings. Head here if you ever want to change how AutoCorrect behaves, or customize your Ribbon.
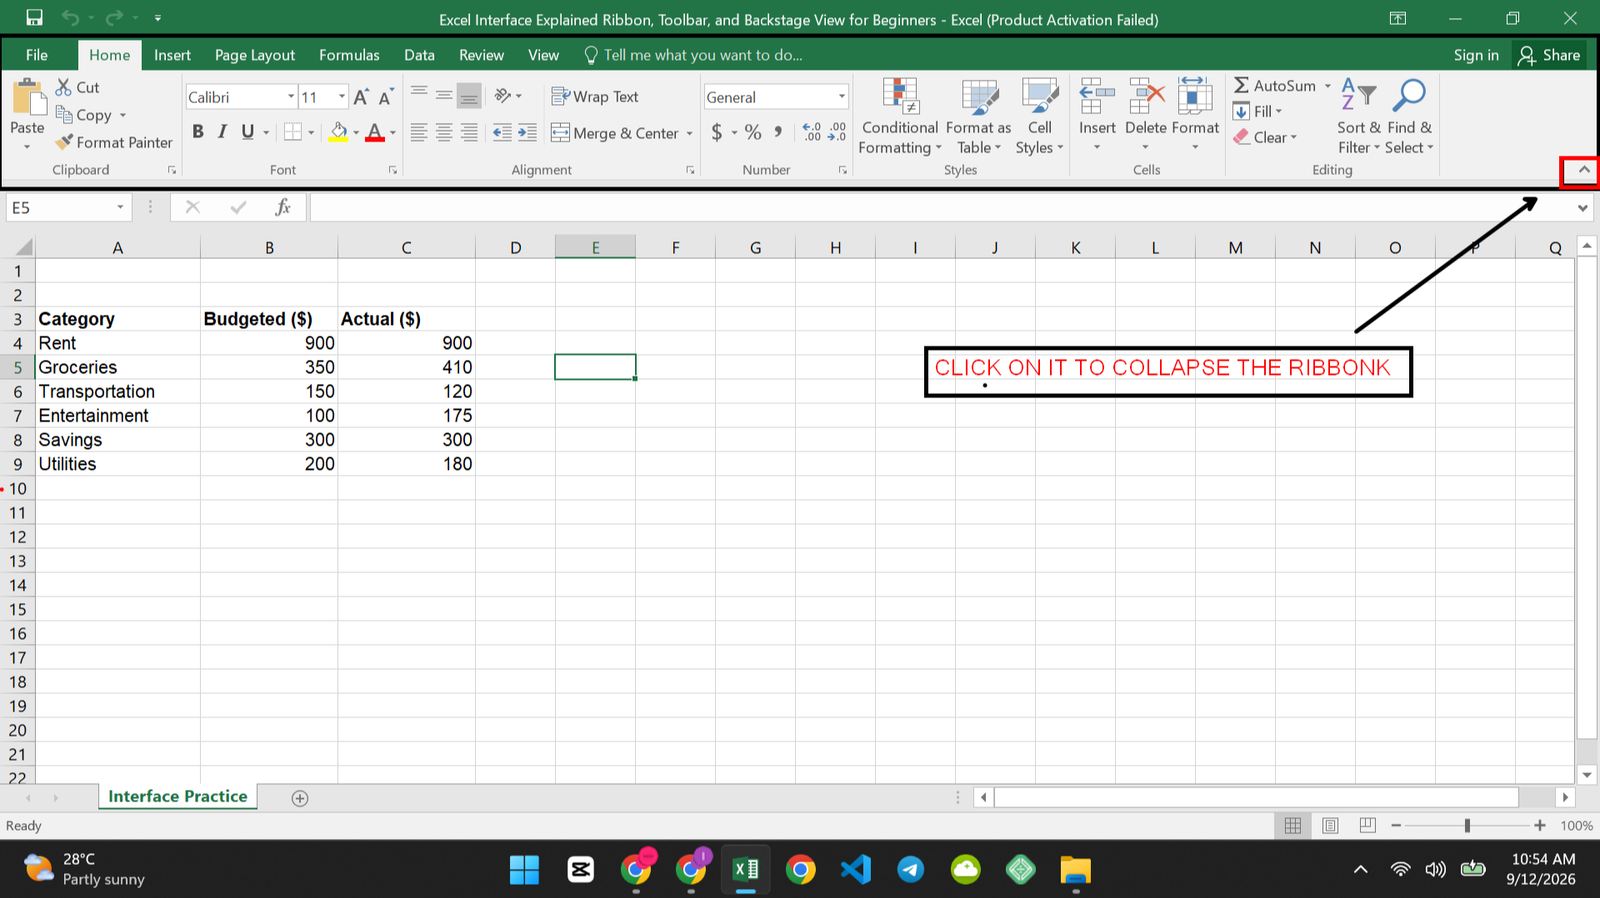
Common mistake: Clicking File, then feeling stuck because the familiar grid is gone. Click the back arrow in the top-left corner of Backstage View, or press Escape, to return to your worksheet.
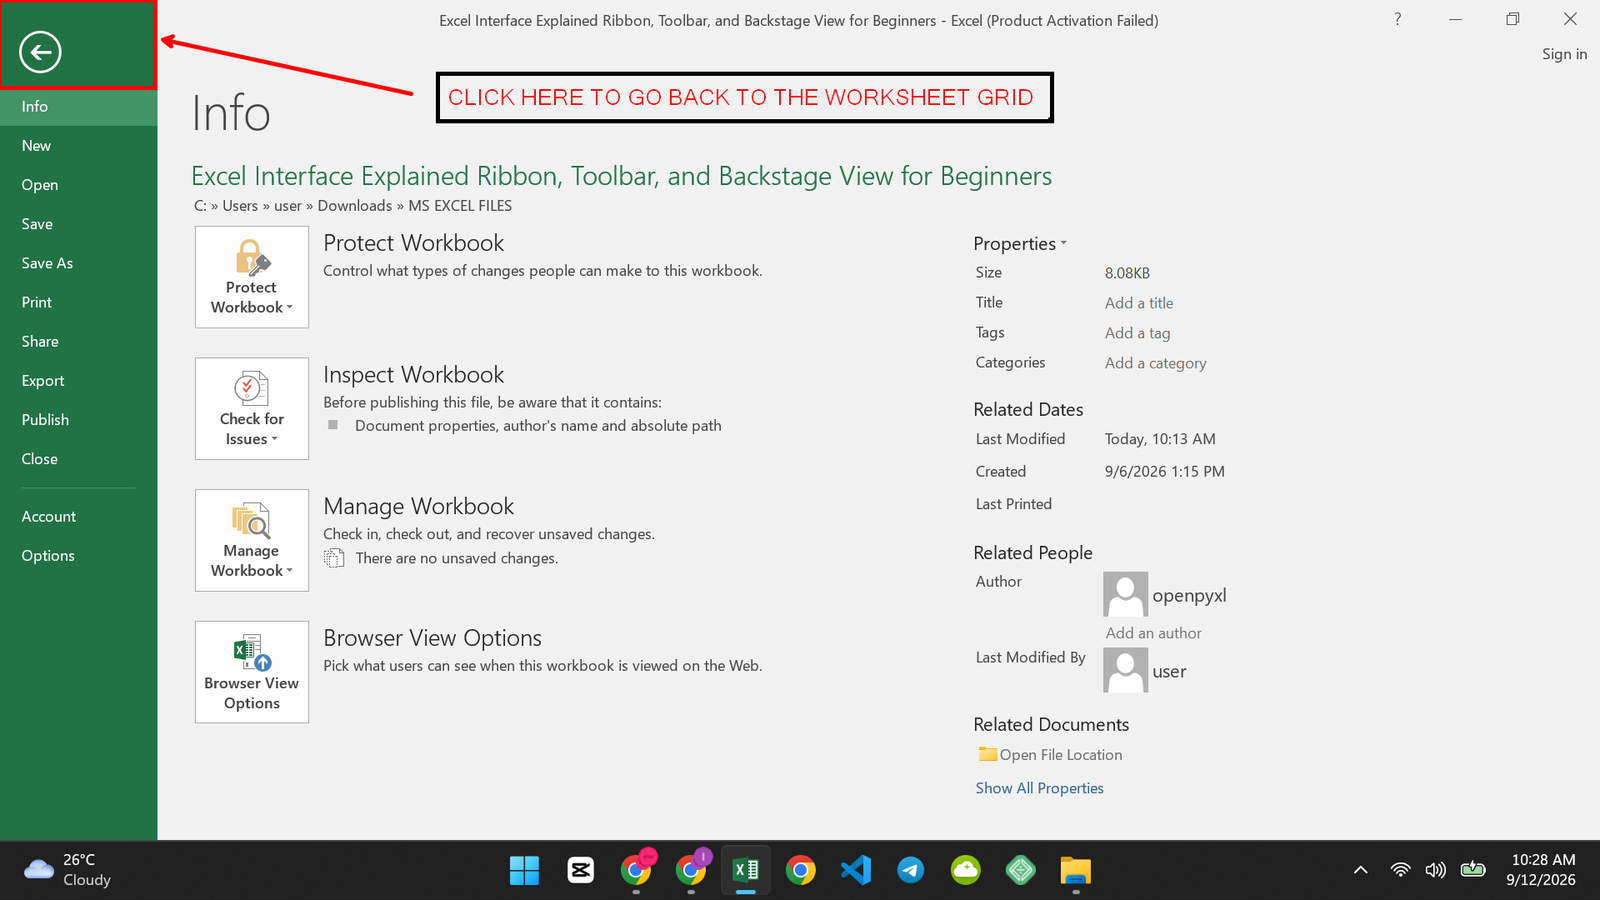
Step 5: Minimize the Ribbon When You Want More Screen Space
What to do: Find the small upward-facing arrow near the top-right of the Ribbon. Click it. Or press Ctrl+F1. Either one collapses the Ribbon down to just the tab names.
BEFORE:
AFTER:
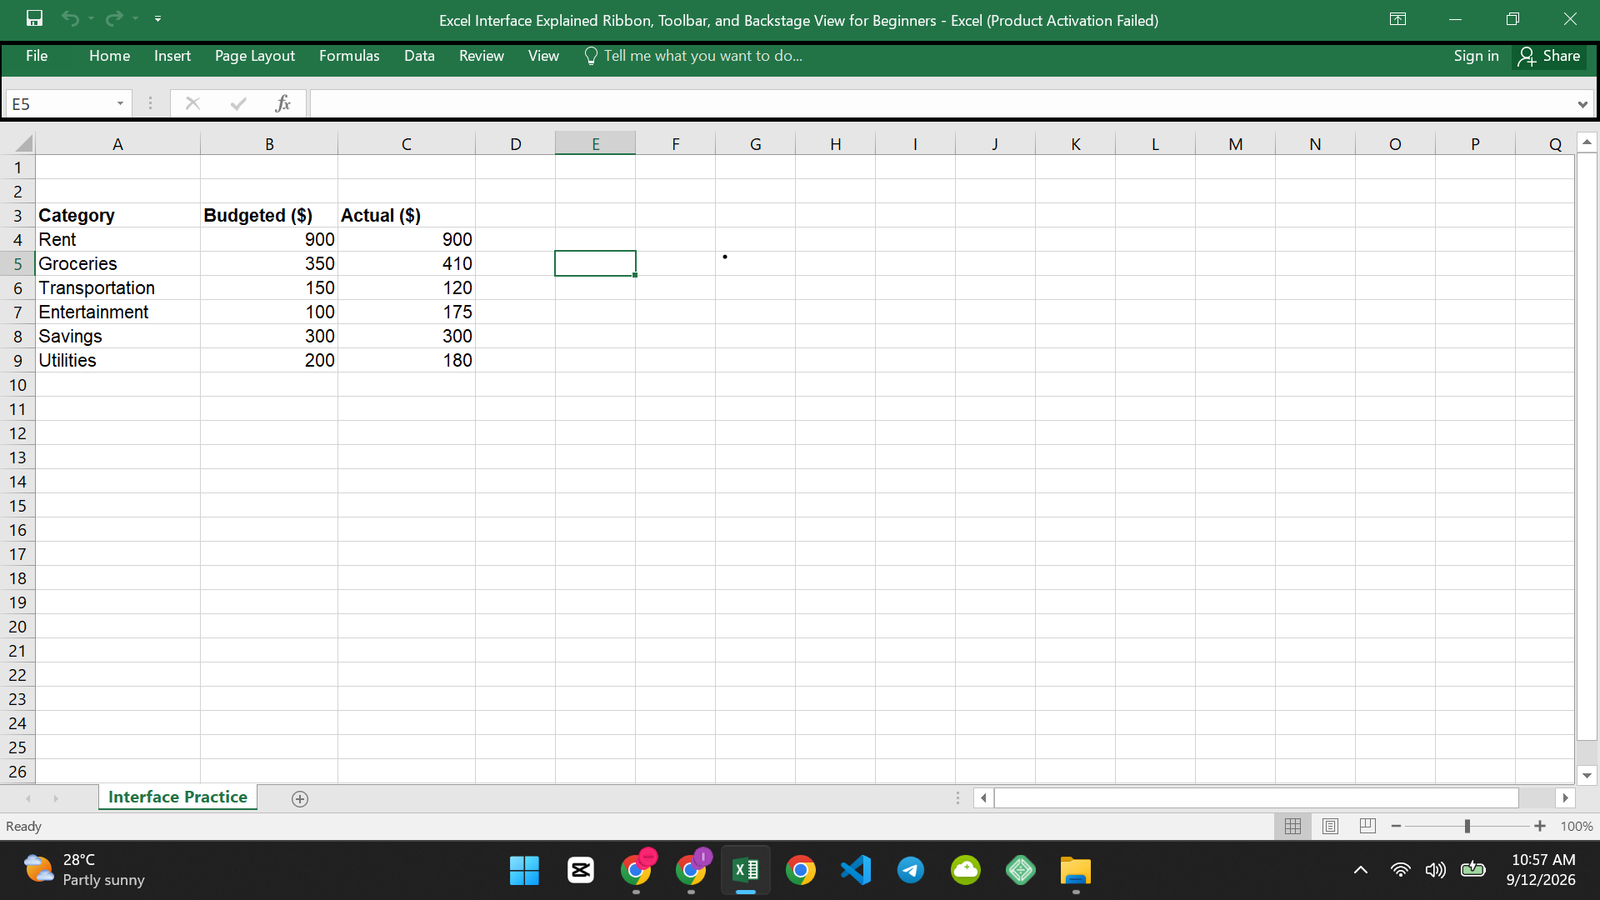
Click a tab name, or press Ctrl+F1 again, to bring it back.
Why I’m having you do it this way: On a smaller screen, especially a laptop, the Ribbon can eat up space you’d rather use for your data. Collapsing it gives you a taller view of your worksheet without losing access to any commands.
What you should see: The buttons and groups disappear. Just the row of tab names stays. Click a tab name and its buttons briefly reappear. They hide again once you click back into the worksheet.
Common mistake: Minimizing the Ribbon and then not realizing why buttons “vanished.” If your Ribbon suddenly looks empty, check whether it’s just collapsed.
Why This Works
Microsoft organized the Excel interface around what you’re trying to do, not around a single giant list of every possible command. Commands that change your data, like formatting text or inserting a chart, live on the Ribbon’s tabs.
Commands that manage the file itself, like saving or printing, live in Backstage View. And the commands you personally use most can live in the Quick Access Toolbar, independent of whichever tab you’re on. Once you see the interface as three purposes instead of one big wall of buttons, the Excel interface stops being scaring.
A Different Way to Do It
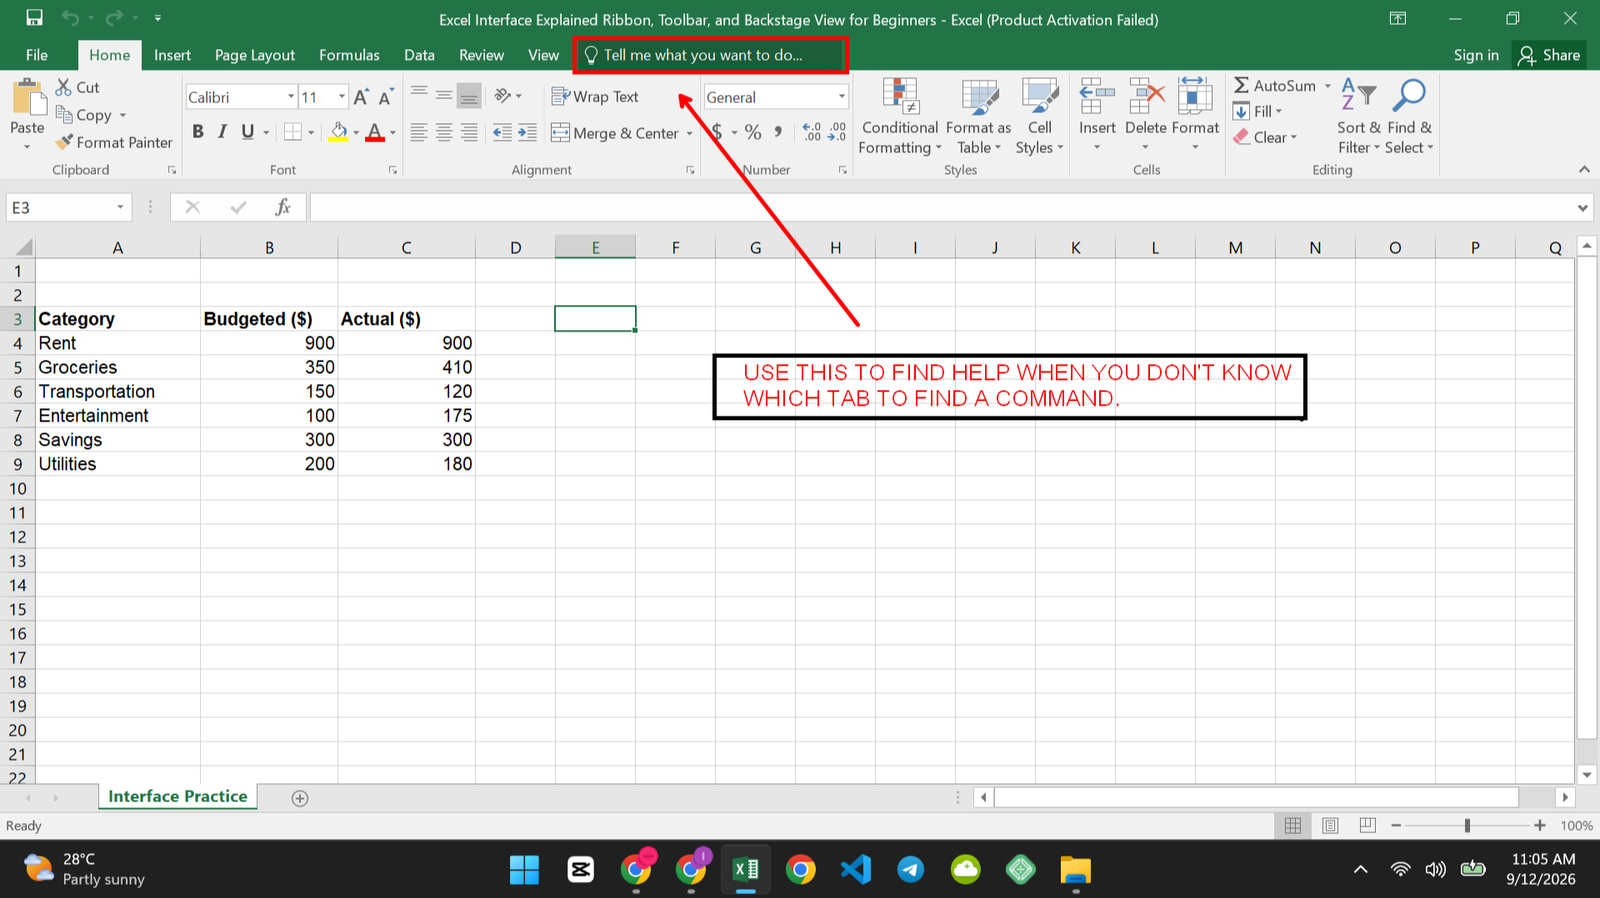
If you’d rather not hunt through tabs at all, you can use the search box, usually labeled “Tell me what you want to do” or a small magnifying glass icon near the Ribbon, and type in the name of the command you’re looking for. I’d use this when I know exactly what I want but can’t remember which tab it lives on, though it’s worth learning the tabs too, since typing a search every time is slower once you’re used to where things are.
Common Problems and How to Fix Them
| Problem | Why It Happens | How to Fix It |
| The Ribbon looks completely different from a tutorial or screenshot | Different Excel versions, or Excel for Mac versus Windows, arrange some buttons differently | Focus on the tab name and group name rather than the exact button position, since those stay more consistent across versions |
| Backstage View won’t close | Clicking outside the menu doesn’t close it the way clicking outside a regular dropdown does | Click the back arrow in the top-left corner, or press Escape |
| A command seems to have disappeared entirely | It’s likely on a different tab than you expect | Check Insert and Data tabs first, since they hold many less obvious commands |
| The Ribbon keeps collapsing on its own | The “auto-hide” or collapse setting got turned on, sometimes by an accidental click | Click the small arrow or pin icon near the top-right of the Ribbon to lock it open again |
Tips to Avoid These Problems Next Time
- Learn tabs by task, not by memorizing button positions, since positions shift slightly between versions.
- Right-click any button you use constantly and pin it to the Quick Access Toolbar right away.
- If you’re ever unsure whether you’re looking at the Ribbon or Backstage View, check whether your worksheet grid is visible. If it’s gone, you’re in Backstage View.
Frequently Asked Questions
What is the Ribbon in Excel? The Ribbon is the row of tabs and buttons across the top of the Excel window. It replaced the older dropdown menu system starting in Excel 2007, grouping commands by task instead of hiding them in nested menus.
What is Backstage View in Excel? Backstage View is the full-screen menu that opens when you click the File tab. It holds file-level tasks like Save, Save As, Open, Print, and Info, separate from the regular Ribbon tabs.
How do I get the Ribbon back if it disappears? Click any tab name, or press Ctrl+F1, to expand it again. If it’s still missing, check whether Excel is running in full-screen mode, which can hide the Ribbon along with other interface elements.
What is the Quick Access Toolbar for? It’s a small, customizable row of icons that stays visible no matter which Ribbon tab you’re on, so you can reach your most-used commands without switching tabs.
Is the Excel interface the same on Mac and Windows? The core idea, Ribbon, tabs, and Backstage View, is the same, but some button positions and menu wording differ slightly between Excel for Mac and Excel for Windows.
Can I customize which tabs show up on the Ribbon? Yes. Right-click anywhere on the Ribbon and choose “Customize the Ribbon” to show, hide, or reorder tabs and groups to fit how you actually work.
Wrapping Up
You now have the Excel interface explained in a way that should stick: the Ribbon organizes commands by task across its tabs, the Quick Access Toolbar holds your personal favorites, and Backstage View handles anything to do with the file itself. That’s the whole map, and once it clicks, every future tutorial that says “go to the Home tab” or “check Backstage View” will make immediate sense.
If you haven’t already, start with What Is Excel Used For? A Beginner’s Guide to Microsoft Excel, then come back here whenever you need a refresher on the screen itself.


Pingback: The Excel Home Tab Explained: Every Command, Shortcut, and Use Case - SuperSimpleTips